Cheyenne Garden Gossip

Gardening on the high plains of southeastern Wyoming


Gardeners’ Christmas wish lists

Some kind of greenhouse is on almost every gardener’s wish list. This geodesic design built in Fort Laramie seems to be holding up to Wyoming’s wind. Photo by Barb Gorges.

Gardeners’ Christmas wish lists include tools, vinegar and manure

Published Dec. 15, 2023, in the Wyoming Tribune Eagle.

By Barb Gorges

            I asked Laramie County Master Gardeners what they want for Christmas and received a variety of replies, from tools to greenhouses to sheep manure.

            Manure?!

            Donna Woitaszewski wrote, “My biggest garden wish this year is to have some sheep do-do tilled into my garden spot. I’d take basically any good organic soil-builder but that one comes to mind first. I don’t have a truck, a tiller, or any help to do it, so Santa would need to include that, too.”

            Equally basic, Peggy Zdenek wants wooden posts for installing a fence. Fencing can be so important. Not only does it separate animals and people from tender plants, but solid fences can throw a little shade and act as a windbreak out on the prairie.

            Tools are a popular category. Christine and Steve Johnson garden on a larger scale than many of us, so I’m not surprised by the larger tools in their long list. It’s actually from last year, but now that they’ve tried these items, they highly recommend:

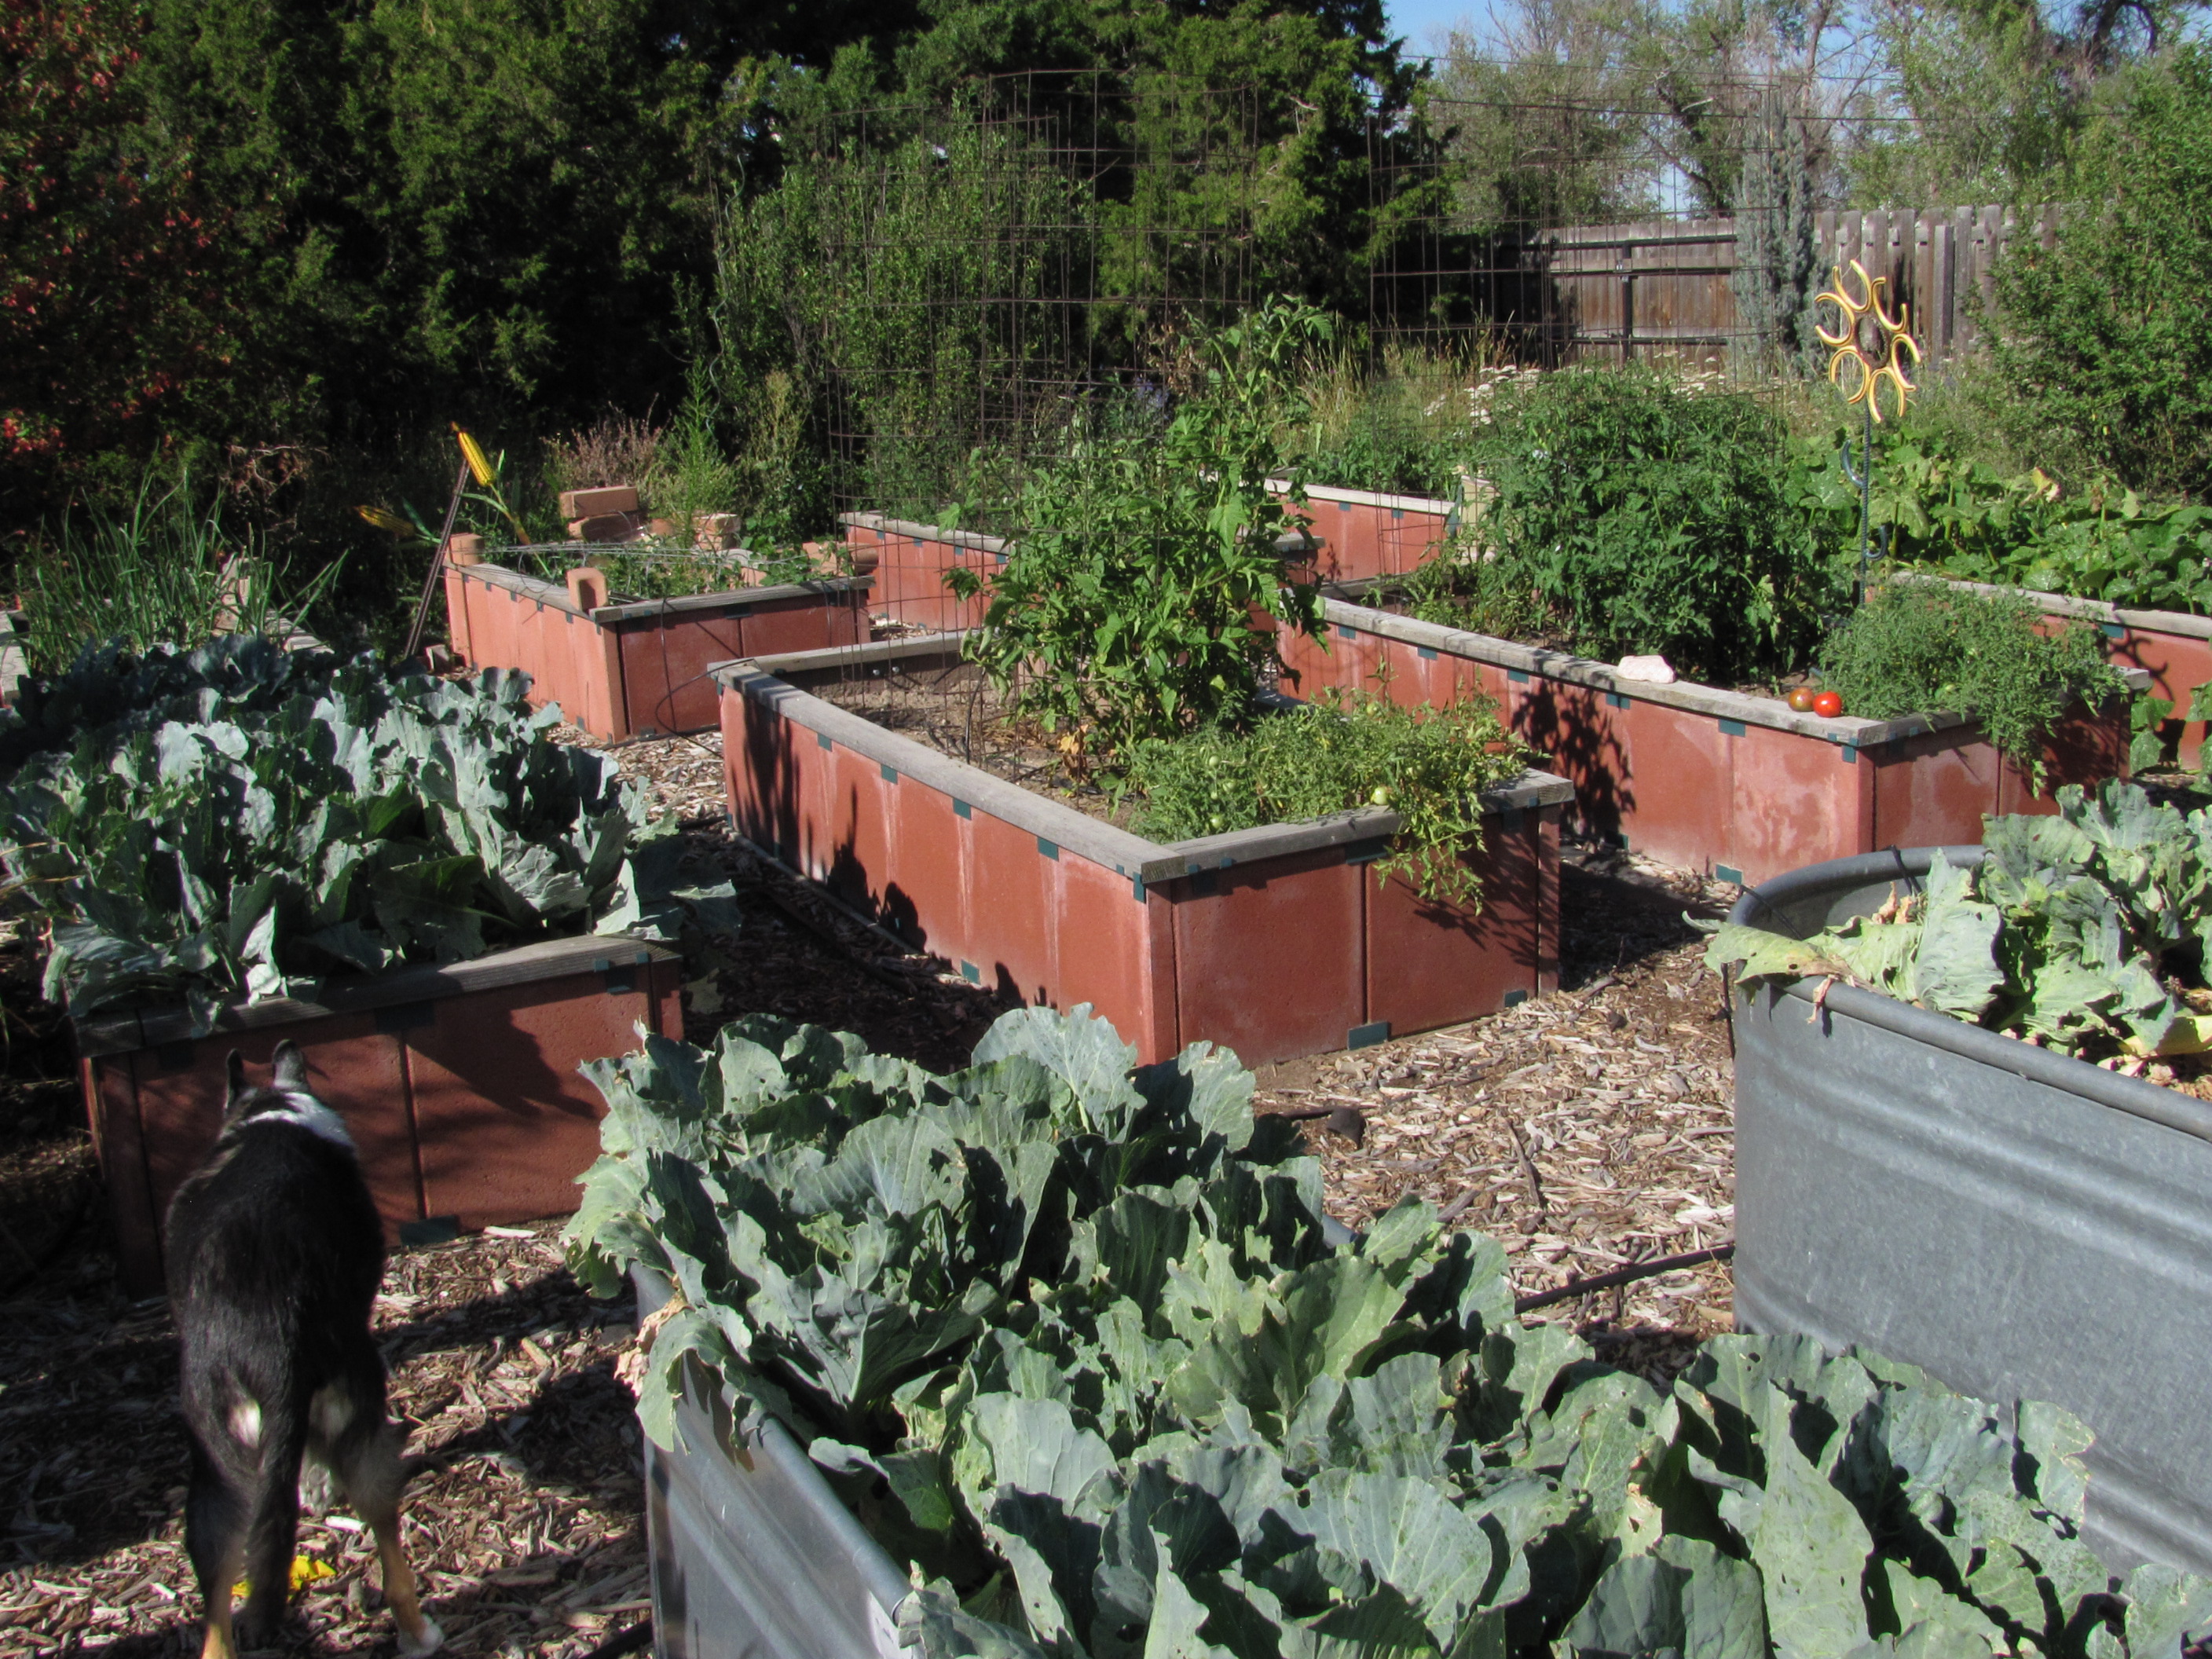
–Raised garden boxes with hoop tops that can be removed

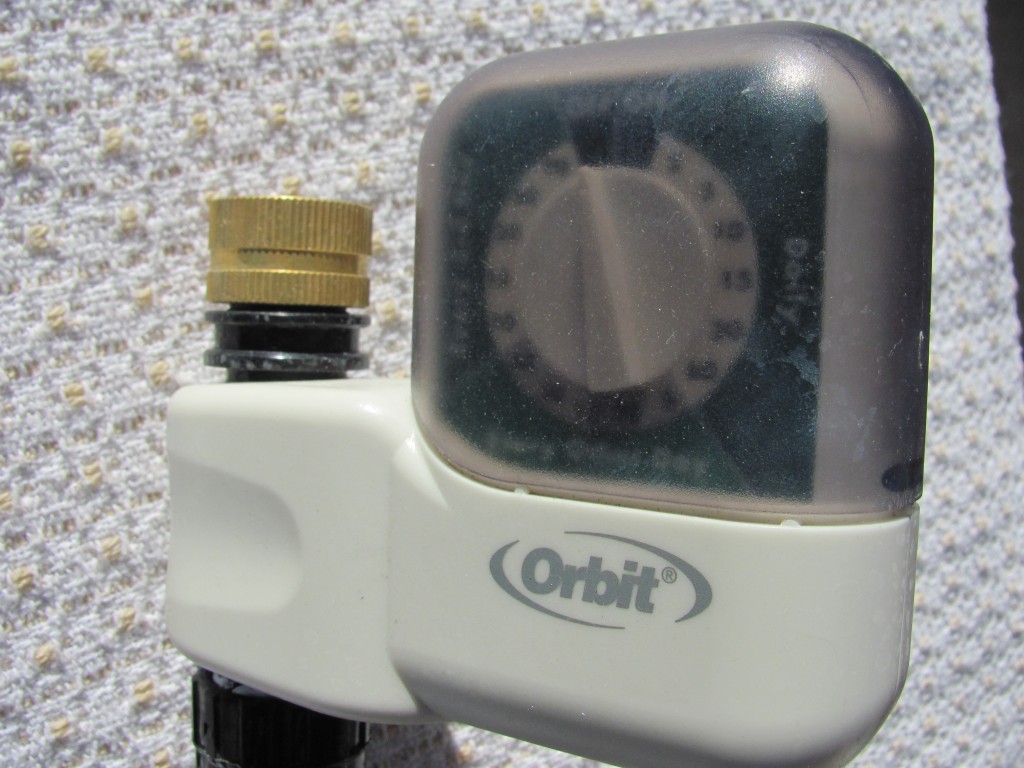
–Automatic timer for the outside faucet  
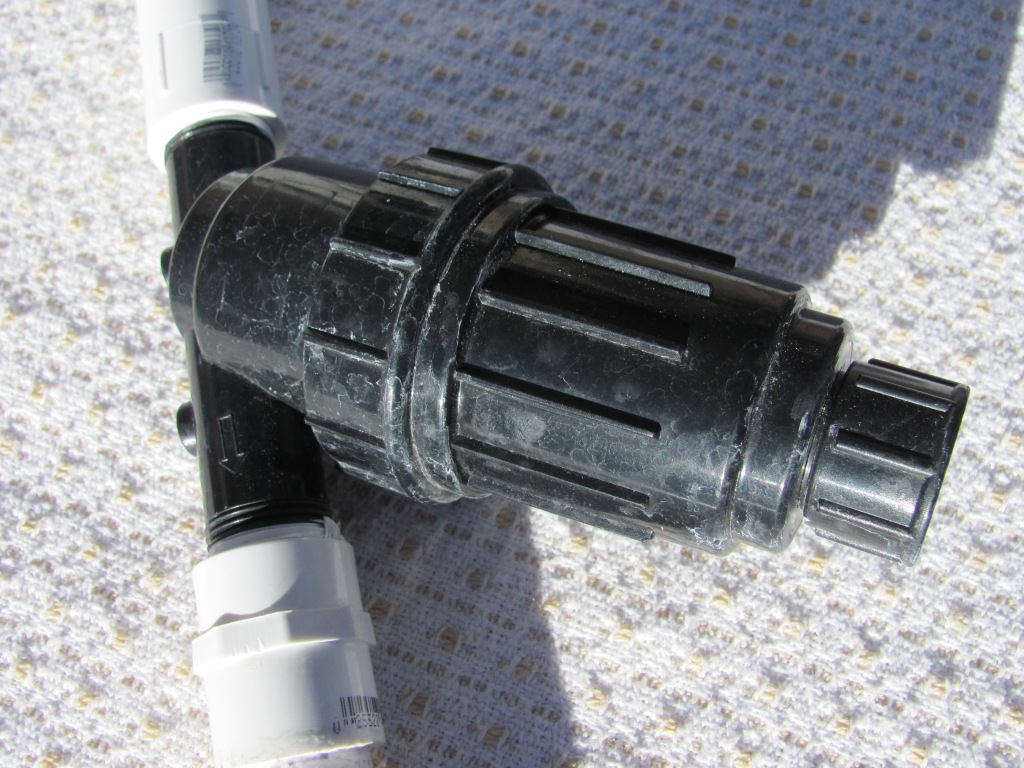
–Drip system

–Tree spade, (flatter than a shovel)

–Hoss wheel hoe plow and attachments (you push the wheeled plow) 

–Scythe or brush cutter with curved steel blade and two wooden handles from vidaXL.

            Power tools are on the lists of two women. Kathy Juniker says she wants a ‘girl-sized’ garden tiller. “I need to get rid of more turf grass and build more flower beds full of pollinator friendly plants. Digging out that sod by hand is back-breaking! There is a Black and Decker electric tiller that we had at the Boys and Girls Club this spring that I could handle. It’s not that expensive.”

            Rosalind Schliske wrote, “Earlier this year, Keren Meister-Emerich wouldn’t stop raving about her new battery-operated DeWalt pruner. She was so excited that she had filled her husband’s truck so many times with branches to take to the city compost facility.

            “Then in June, the Prairie Garden Club held its cleanup of the grounds at the Historic Governors’ Mansion. Members Jutta Arkan and Martha Mullikin were using their DeWalt pruners to cut back the numerous white roses and other out-of-control bushes around the building. They, too, raved about the pruner, and seeing it in action, I could understand why.

“However, I didn’t wait until Christmas to buy my own. In addition to cutting the usual suspects like lilacs and cotoneaster, it was amazing during fall cleanup on thick-stemmed goldenrods and hollyhocks and even thinner perennials. The lightweight pruner is wonderful for those who us without a lot of hand strength. I think we all would highly recommend the 20v MAX cordless battery-powered pruner (DCPR320).”

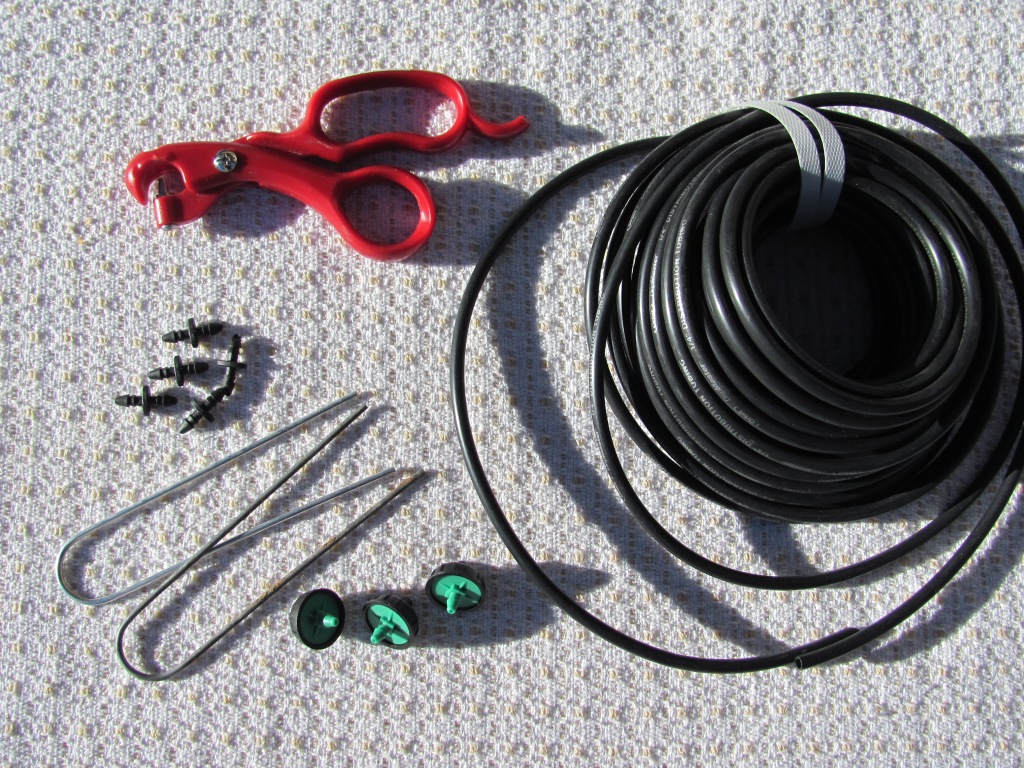
            Sabine McClintock hopes her Santa hears her wish for a way to store very long, heavy-duty hoses. And maybe make her a simple board with large nails for holding tools. And find some 30% horticultural vinegar for killing weeds.

            I don’t know if it will work for Sabine, but Suzy Sauls told me about her dream hose from Hoselink. A hundred-foot hose retracts itself into a tidy container the homeowner mounts on a post next to the outside faucet. And the company has fittings for hose ends so they easily snap together, instead of being difficult to twist and then they still leak.

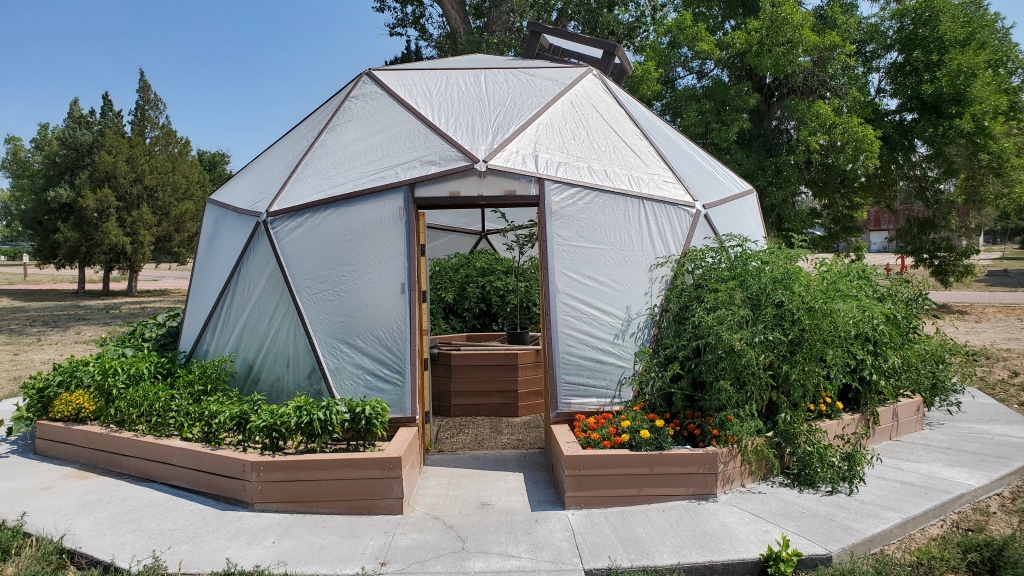
            A greenhouse always makes this list—well, not made of glass in our climate. Marla Smith said, “The only thing on my Santa list is a high tunnel. The ability to extend the season for my flowers and vegetables would give an additional support to everything I enjoy about gardening in these high altitudes!”

            Having heard of at least two high tunnels self-destructing in our wind, I asked Marla if she had heard about the stronger, geodesic dome types. Yes, she had, even helping erect one during last spring’s Bee College at Laramie County Community College. She hasn’t been able to choose between them yet.

            Jutta Arkan, on the other hand, thinks the Master Gardeners could play Santa by contributing a garden-themed bronze to the collection on downtown street corners. She’s even picked out Loveland, Colorado, artist Julie Jones’s “Sweet Moment.”

            If you are tasked with finding a gift for a gardener, consider gardening magazines like “The American Gardener.” Or, a Cheyenne Botanic Gardens membership which gets members into 300 other gardens across the country for free or special rates.

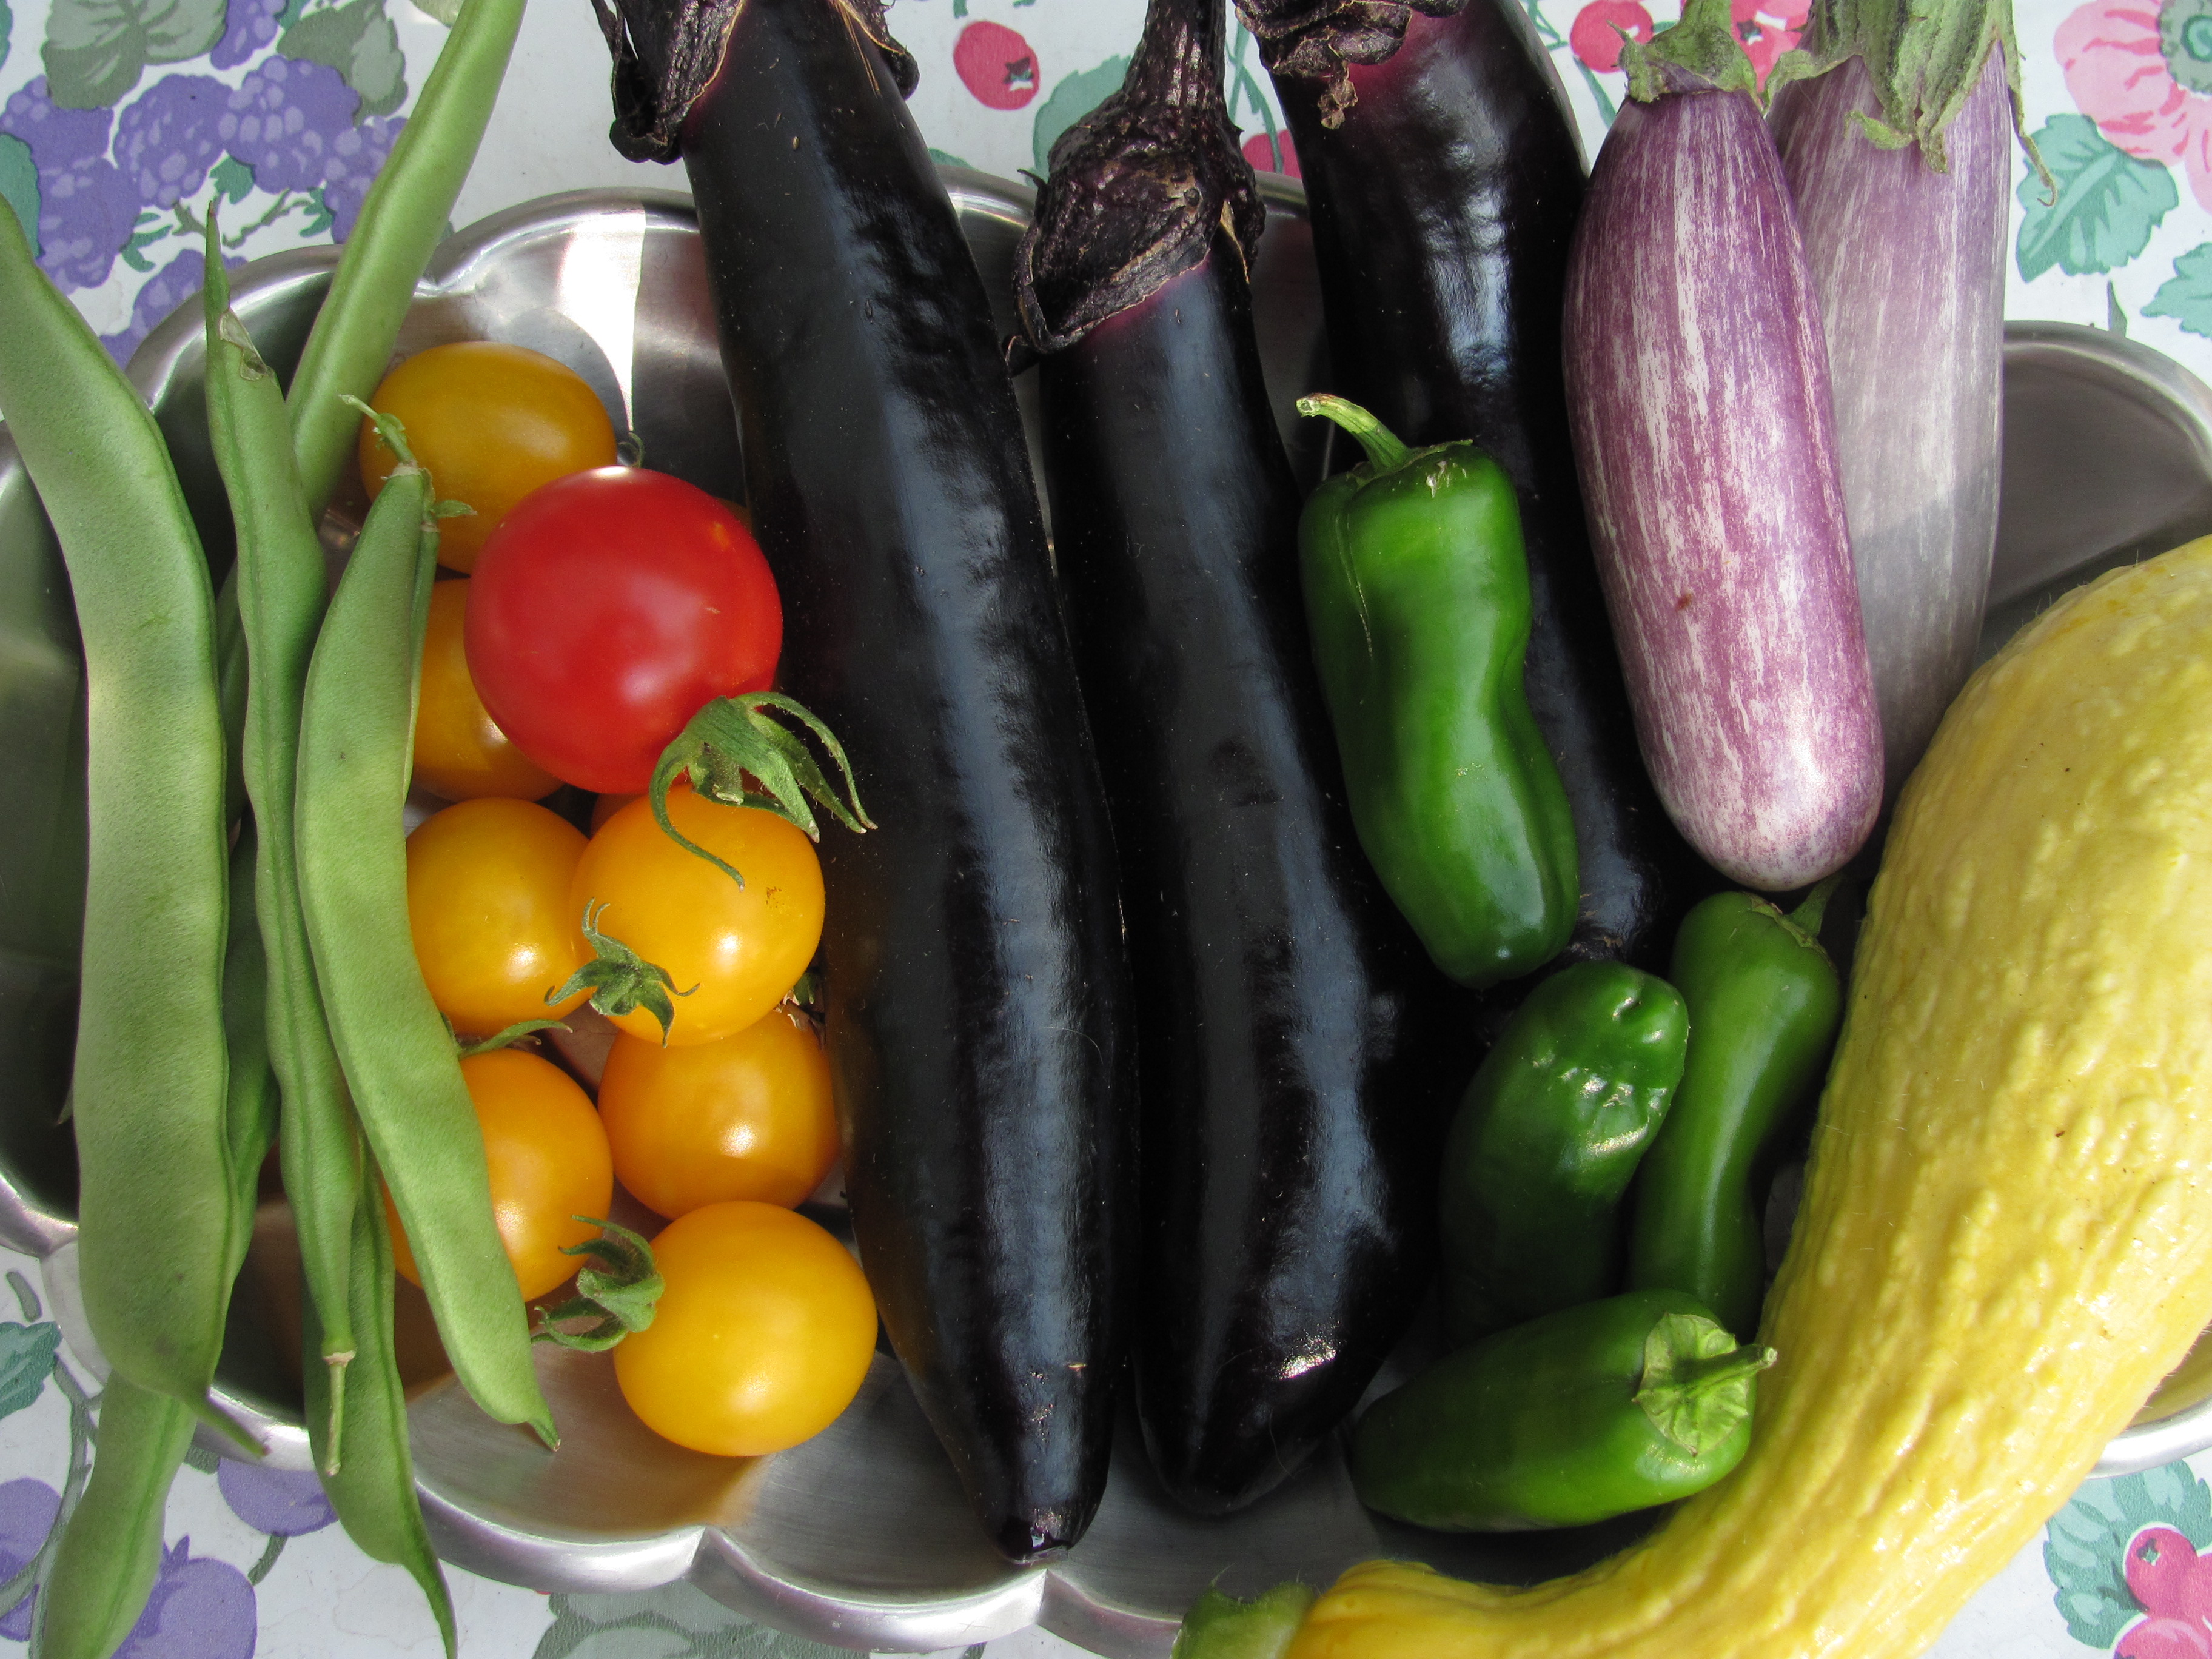
            Or, maybe a gift certificate for an appropriate seed catalog like Pinetree Garden Seeds from Maine. They specialize in vegetables for short growing seasons like ours.

            Or, a big, fat, garden-filled coffee table book to sink into when winter is at its worst.


“Greenhouse in the Snow” tour

Here’s a peek inside the Brights’ “New Greenhouse in the Snow.” Photo courtesy Greenhouse in the Snow.

Geothermal “Greenhouse in the Snow” is popular way to grow fruits and vegetables year round

Published Oct. 13, 2023, in the Wyoming Tribune Eagle.

By Barb Gorges

A greenhouse is at the top of many gardeners’ wish lists in a climate like ours.

Hoop houses are affordable, but our wind can quickly shred them. Plus, greenhouses are expensive to heat if you want to grow through the winter, not just get an early start in spring and extend the season in the fall.

Russ Finch, of Alliance, Nebraska, where winter is even colder than here in Cheyenne, gave the problem some thought about 35 years ago.

First, for heating, he decided to go with geothermal. He’d already tried it and liked it for his home. In our climate, the temperature is a constant 50 degrees at 8 feet below ground level. If you put tubes filled with air (some systems use fluids) down there, you can circulate it to help you warm a structure in winter, or cool one in summer.

Second, he put a third of the greenhouse height below ground level. A conventional greenhouse may have tables at counter height filled with pots of plants, or plants are planted in raised beds or directly in the ground. Russ dug out a 4-foot-deep trench that was 4 feet wide for planting citrus trees. The shoulders on either side, held in place with retaining walls, grow shorter plants.

Conventional greenhouses have glass or other light-conducting coverings all the way around. Russ put a solid wall in on the north side of the long, south-facing structure to conserve heat.

Russ’s “Greenhouse in the Snow,” https://greenhouseinthesnow.com/, worked so well, other people wanted to build one. Eventually, Russ, now in his 90s, partnered with Allen Bright, who has a machine shop in Alliance and can make the overhead trusses from steel.

Laramie County Master Gardener Charles Pannebaker suggested we take a tour of this amazing greenhouse last month, and 13 of us went with him. He is the most likely of us, partnering with his son, to build one.

We toured the “New Greenhouse in the Snow,” built at Allen’s house eight years ago. His wife, Lisa, gave the tour. She has orange, lemon, lime, kumquat, grapefruit and fig trees growing along with pineapples, everbearing strawberries, vegetables and herbs, plus flowers for the bees.

While Russ made it a business taking his produce to the farmers market so people could buy locally-grown citrus, Lisa is more interested in experimenting and gives away surpluses.

Much of Lisa’s information concerned general greenhouse management issues such as how to deal with pests like whiteflies and aphids. She has turtles and toads helping, plus safe sprays. She uses a combination of drip irrigation and spray irrigation on timers.

Some crops can be grown regardless of the season, but others, like tomatoes, require additional lighting in winter because winter days are just not long enough. Lisa does not use supplemental lighting and adjusts her crops seasonally.

While a kit and labor for building this geothermally-heated greenhouse is comparable to a conventional glass one, the difference is that heating and cooling cost very little. A conventional garage heater may have to kick in when temperatures get down to minus 20.

Kits can be ordered for a structure as short as 56 feet long and in 6-foot increments up to 102 feet. Some components you buy locally. You can save on labor if you have your own backhoe and have construction experience.

Ballpark cost for the newest full-length kit is equivalent to one new pickup. Labor would equal a second, fancier truck. But you would save on your grocery bills and could skip the trips to Hawaii you used to take to warm up mid-winter.

Next to the “New Greenhouse in the Snow” at the Brights’ is the “Newest Greenhouse in the Snow” that was still under construction when we toured it.

The idea, Lisa said, is to make this one more accessible and more aesthetically pleasing. The trench is still 4 feet deep, but it is 8 feet wide and the beds on either side are only 3 feet high. The retaining walls have planting pockets in them and there are upright supports that could support hanging baskets and vines.

The north wall is heavily insulated. The 230 feet of geothermal tubes are laid directly under the greenhouse instead of buried in a trench circling it. Solar electric runs the system. The floor is covered in concrete pavers instead of woodchips. The pavers can be removed wherever trees are going to be planted.

It will be interesting to see how the newest version works. Meanwhile, the “new” version is selling like hotcakes, 700 so far. Russ and the Brights have licensed businesses in Canada and France to offer the kits so shipping costs don’t get out of hand. A deal in Australia is pending.  


Blank slate garden opportunity

Rockwork can add interest to a garden or actually be the garden. This is the Crevice Garden outside the door to the Cheyenne Botanic Garden’s Grand Conservatory. Photo by Barb Gorges.

Published in the Wyoming Tribune Eagle May 19, 2023, Page A9, “Blank slate gives gardener myriad of opportunities”

Blank slate gives gardener myriad opportunities

By Barb Gorges

            Imagine this: a blank slate, a flat 12 by 40 feet of nearly bare dirt.

The dirt looks good, nearly weed-free. One long side is backed by concrete block wall painted black, so almost any plant by it will look good. A sidewalk edges the other long side and is backed by a red brick garage wall.

I’m a little jealous that Kim Parfitt has all that empty space without having to dig up lawn. I could fill that up in no time with one trip to a good nursery.

In fact, the Cheyenne Habitat Hero Committee is about to do that very thing as an extension to the Habitat Hero garden by the flagpole at the Cheyenne Botanic Gardens. The extension’s outer perimeter is a 30-foot-long curve and figuring the square footage is beyond my geometry skills. But I think 72 new plants should do it.

Kim has something more interesting in mind. She wants some topography. She likes the crevice garden at the entrance to the CBG’s Grand Conservatory. Good news is that she has a wide gate between the garden and alley for delivery of large rocks, and probably a cubic yard or two of extra dirt she can haul from Cheyenne’s compost facility with her husband’s pickup. Shrubs can also offer some diversity in height.

Kim’s thinking about a groundcover, maybe clover, for a path for the dogs to wind through the topography. Unless it’s mowed to keep it from flowering, the bees attracted to clover might make it hazardous to walk barefoot, paws included. The compost facility has lots of wood chips for path making.

The very first step (which I have never taken, so my home garden looks like a patched crazy quilt) is to get out the graph paper and measure and draw the garden boundaries.

The next step is to figure out where the water faucet is and how to get water to potential plantings. The former owners of Kim’s house had set up plastic pipe along the black wall with four or five sprinkler heads to water the grass that used to be there, plus some drip irrigation tubing for a raised vegetable bed in the far corner.

My suggestion is to scrap all the old irrigation. It’s better to have soaker hoses running along the surface of the garden than to have the plants sprayed with water. Drip irrigation and soaker hoses mean less wasted water. Designing a system needs to go hand in hand with deciding where the plants and paths are going to be. There are people who design watering systems as a profession.

At the same time, Kim needs to think about what plants she is planting. With her experience teaching high school AP classes in environmental science, I’m guessing she’s thinking about native plants. But she might mix in some of her favorites and discover some water-wise exotic beauties among the natives from Plant Select offered at area nurseries and mail order from High Country Gardens.

The trick is to sort the plants by their needs. The ones that need the least water (after they’ve had plenty to get started) can be at the far end of the yard since Kim said the water pressure is poor that far from the faucet.

Identifying sunny and shady areas is important too. I’ve grown Rocky Mountain penstemon in the shade for 30 years and it blooms but then flops over. I moved some to a sunny location and it’s become a vigorous, bushy plant.

When Kim first described her new garden area, she said she needed to get it rototilled. But that’s no longer a given these days, even for vegetable gardening. If your vegetables need soil amendments, add them to the top couple of inches. There’s a whole community of helpful little soil microbes that die when you dig too much. Also, disturbing soil exposes weed seeds that use sunlight to germinate and then you’ll have more weeding to do.

I suggested to Kim when she’s buying perennial plants, pick smaller ones, in 2.5-inch pots instead of 1-gallon pots. After you gently shake the potting soil off the roots, you only need to slice open the soil with your shovel and insert them. The roots quickly reach out, whereas if you plunk in the whole root ball, potting soil included, the roots just circle around and around in that “cotton candy.”

This year, planting a few easy-peasy annuals can be instant gratification while the perennials get established. The first year, perennials sleep, says the old axiom. The next year they creep and it’s the third year they leap!


Tomatoes at altitude

Growing tomatoes without staking them is a common practice where Charlie Pannebaker is from. Photo by Barb Gorges.

There’s more than one way to grow a tomato in Laramie County

Published in the Wyoming Tribune Eagle Nov. 18, 2022.

By Barb Gorges

            Tomatoes are the epitome of backyard vegetable growing. They test both your gardening know-how and your ability to adapt to your circumstances.

            This past summer, two of Laramie County Master Gardeners’ informal garden tours, open to members, friends and family, featured tomatoes, but grown in radically different ways. However, both gardens were located west of town at substantially higher (read “colder”) elevations than Cheyenne.

Ron Morgan discusses his greenhouse tomato growing method. Photo by Barb Gorges.

            The first garden, off Happy Jack Road about halfway to Curt Gowdy State Park, is the playground of Ron Morgan. His solution to cold growing conditions 500 feet higher than Cheyenne is to use a greenhouse.

            With plenty of experience in the construction trade, Ron built a sturdy wooden frame covered in plastic sheeting used for high tunnels and other less-than-permanent structures. Wind and hail made short work of the sheeting, so he installed rigid plastic, 6 millimeter twinwall, which has survived the hail so far.

            Ron is also an able internet researcher, and found a clever irrigation system he could build out of used kitty litter buckets and new rain gutters, based on Larry Hall’s “Gutter Grow System.”

            Each tomato plant gets its own 5-gallon bucket. A hole is cut out of the bottom and a small basket-like device fits in it, extending below. The buckets sit side by side on top of the rain gutter, with the soil in the little baskets catching the water that fills the gutter, watering the buckets by osmosis. A float determines when more water is automatically added to the gutter.

            Ron has 104 buckets on one system, 23 on a shorter system, and is currently growing a few other kinds of vegetables besides tomatoes. You can see how once it is set up it saves time and water.

Ron Morgan grows tomatoes in his greenhouse using a 5-gallon-bucket and gutter system for irrigation. Photo taken Aug. 30 by Barb Gorges.

            Ron also uses an economical support system for his vining tomatoes, training them to grow upward by way of strings attached to the ceiling. Little plastic clips clip onto the string and hold the stems. He adds more clips for each stem as it grows. But he also pinches off any secondary stems, or suckers, to concentrate all the energy into the primary stem.

            Ron said his favorite tomato for flavor is a cherry-type called “Sweet Millions.” It forms grape-like clusters. His favorite mid-sized tomatoes are “Tasty Beef” and “Big Beef.”

            He starts his vegetables in his shop under lights. Though he could transplant them to the greenhouse in April, Ron’s found the required heating isn’t cost effective. He waits until the first or second week in May to plant them – still a couple weeks earlier than in an unprotected garden. By mid-summer he uses shade cloth to keep his plants from getting sunburned.

Charlie Pannebaker, red shirt, discusses his tomato trials with visiting Master Gardeners Sept. 8. The empty row is where the beans have already been harvested. Photo by Barb Gorges.

            Charlie Pannebaker, on the other hand, lets his tomatoes sprawl on the ground, uncovered. This summer he trialed 10 varieties to see which would be the earliest, tastiest, most productive in his growing conditions.

            None of the visiting gardeners had ever seen tomatoes grown without a support of any kind, but I had, at the Rodale Institute near Emmaus, Pennsylvania. I asked Charlie if it was a Pennsylvania thing. It might be, as it turns out he grew up on a Pennsylvania farm, and this was the way farmers grew tomatoes.

            Charlie and his wife moved to their place off Horse Creek Road a couple years ago, after 30 years in southeast Colorado. He knew his new place at 6900 feet elevation, 800 feet higher than Cheyenne, would require short-season vegetable varieties.

            When we visited September 8, jumbles of tomatoes in tangles of vines lay on top of black plastic in rows along the drip irrigation lines.

            A month later, after unusually late killing frost, Charlie sent me his results.

            Of the total 507 pounds from all 10 varieties, the top four producers made up 70%, or 337 pounds. They were, beginning with the most productive, Fireworks, Siletz, Bush Early Girl Hybrid and Summer Girl.

            However, he and his wife, Fran, liked the taste of Ru Bee Dawn best and he liked Summer Girl for shape, size and uniformity. Fireworks had the best fruit quality – Early Girl had a lot of blossom end rot.

            Fourth of July had fruit ripening two weeks earlier than the others. It had the best yield through August, until the higher yield varieties passed it in September and October (unusually late for killing frost this year).

            Next year Charlie is planting Fireworks for yield, Fourth of July for earliness, Ru Bee Dawn for taste and Summer Girl for fruit quality.

            He hopes to find new varieties that combine all four attributes, as well as look for an early paste variety.

            And Charlie should think about getting some hail protection in case there’s no drought to dry up the hail next year.

“Bush Early Girl” is one of Charlie Pannebaker’s trial tomatoes. Photo by Barb Gorges.


Weeds, seeds and water

Many desirable Wyoming native perennials, like this showy milkweed (Asclepias speciosa), easily self-seed in gardens. Photo by Barb Gorges.

Published Nov. 20, 2021, in the Wyoming Tribune Eagle.

Weeds, seeds and water: what I learned this growing season

By Barb Gorges

           This last summer I learned how three different gardens had three different personalities despite all featuring perennial flowers for pollinators.

Weeds

            My home flower beds are reclaimed from the lawn and surrounded by it. So my weed, unwanted vegetation, is bluegrass, which spreads by rhizomes—horizontally spreading roots. I just dig around the edges, and maybe enlarge a bed while I’m at it and add some leaf mulch. These beds are stuffed with plants so there is very little bare ground and sunlight to encourage weed seed sprouting.

             There were very few weeds in Garden #2. I checked it once a week, spending 20 or 30 minutes mostly looking for the few weeds and taking pictures of what was blooming. It has bare spots where I’ve tried again and again to get something to grow, but other spots are filling in nicely.

            Garden #3 was a weedy mess this year. Every week there was a plethora of fresh weed seedlings. It was mostly kochia, traceable to weed skeletons blowing in over the winter and dropping their seeds. I realized as the summer progressed that pulling weeds disrupts the soil and exposes a new crop of seeds to sunlight. Many weed seeds need light to sprout.

            If the ground is moist, the smallest weeds can be carefully pulled out without disturbing soil. But the annual weeds that get big quickly, like kochia, maybe should just be cut off at ground level. But probably not perennial weeds like bindweed and thistle that double when cut.

            Whether something is a weed is dependent on the gardener’s definition. For instance, curlycup gumweed is one of the yellow, daisy-type flowers in late summer. It decorates the edges of our roads. It needs little water, attracts pollinators and it is a Wyoming native. But it self-seeds prolifically and may be better suited to a meadow-style perennial garden than a formal garden—even if the formal garden is also a water-smart garden for pollinators.    

Seeds

            Perennial gardens planted with natives and varieties that haven’t lost their reproductive powers can be self-perpetuating. As weedy as Garden #3 was, it also had a bumper crop of flower seedlings this year. I was happy to see them because every square inch of the garden that is covered in flowers is another square inch without weeds.

              It can be tricky telling weed seedlings and flower seedlings apart. Sometimes you can tell by proximity—the seed didn’t fall far from the mother plant. But sometimes the seedling leaves are not very much like the adult leaves, so you have to wait a few weeks. Taking photos of seedlings at different stages helps, as does finding a copy of “Weeds of the West.”

Water

            Up to a point, more water means a bigger plant. More water means plants can be grown closer together. Compare a plot in the thick vegetation along a creek with a plot out in the Red Desert. Each plant in the desert has to have a root system spread out around it to quickly grab rain and snowmelt.

            I had no control of the irrigation at either Garden #2 or #3, except for dragging hoses to water transplants for a couple weeks. I can’t tell you the amount or the watering schedule since I visited each only once a week. Eventually, I realized part of the weed problem at Garden #3 was too much water—no wonder the kochia seemed to grow so fast!

            Over at Garden #2 there are dry spots and wet spots. It has a sprinkler system rather than a drip or soaker hose system. Because many of the plants are taller than the often horizontal spray of a sprinkler head,  they block the spray. Those plants get more water than the ones beyond them.

           A system of soaker hoses under mulch would be better, except I’m not thrilled with the idea of plastic hose snaking all over the garden. However, with water shortages in Cheyenne’s future as more and more houses and businesses are built, we are going to have to think about gardens with flowers spaced further apart. Or rain gardens that collect runoff.

           Mark’s and my yard is not exactly water-smart. We continue to use the old lawn sprinkler system, watering the lawn and the flower beds embedded in it. But it also waters our four large old trees. So far, they are healthy and we can afford to water them. Someday though, I’m sure  I’ll be learning how to garden with more sunshine and less water.


Drip irrigation shopping list

drip irrigation parts
Drip irrigation (from top left): punch gun, 1/4-inch tubing, emitters, loop stakes, 1/4-inch barbed couplings.

“Drip irrigation saves time, money, water and backache,” was published Aug. 8, 2020, in the Wyoming Tribune Eagle.

By Barb Gorges

                It’s time for a reprise of the basics of drip irrigation for everyone tired of hauling hoses this summer or who wants to save on their water bill.

                Imagine the twist of a flipper at your faucet or a timer automatically turning on the water. Water travels out to your garden via tubing with little emitters at each plant, or thin tubing with an emitter on the end taking it to farther plants, or through soaker hose tubing.

                Eight years ago, Mark and I installed drip irrigation for our vegetables and flowers at the back of the yard, including a raised bed, hooking it up to our outside faucet.

All the plastic components are still in good shape because they are away from sunlight, mostly under mulch, especially in winter. The few holes were easy to mend. In winter we remove the mechanical parts attached to the faucet and store them inside.

                Installation, including 25 emitters at the ends of 25 quarter-inch spaghetti tubes, took just over two hours.

                It is best if the tubing and fittings are all from the same company, although you may use general plumbing materials to get from the typical ¾-inch-diameter home faucet to the recommended ½-inch-diameter drip tubing for home use.

Whatever brand is sold at your favorite hardware store/garden center, you should be able to find a step-by-step installation manual, such as the one for Orbit, in the store or free online.

                Here is my shopping list from eight years ago (in order of installation from the faucet). Inflation could increase prices by 12 percent, but a check online shows prices vary widely by more than that, even for the same brand.

$3 – Vacuum breaker (3/4-inch), a simple backflow preventer keeps water in the hose or drip tubing from getting sucked back into your household water supply.

$11 – Y-connector (3/4-inch), allows you to hook up the drip system and a hose at the same time and turn them on independently.

$5 – Water pressure regulator (3/4-inch), to prevent blowing up your drip tubing when you turn the water on.

drip irrigation filter
Drip irrigation Y-filter.

$10 – Y-filter (3/4-inch). There are other types, but all keep sediment in the water from clogging emitters.

$6 – Length of PVC pipe, cement, converter to ½-inch tubing, etc. We had the PVC pipe extend to ground level and then attach to the drip tubing.

$0.80 – ½-inch elbow fitting. The tubing is so flexible we didn’t need more than one elbow. There are also T-fittings so that you can have the tubing branch off, down each row of vegetables or to each raised bed. The fittings are forced onto the ends of the tubing—no tool required.

$10 – ½-inch tubing, 100 feet, cuts easily with pruners (make sure it isn’t the heavier tubing for underground sprinklers)

$1.50 – Bag of 10 ½-inch loop stakes to hold the tubing in place.

$10 – Punch gun, makes the right size holes in the ½-inch tubing to fit the emitters or barbed couplings attaching the ¼-inch tubing.

$2 – Bag of 25 ¼-inch barbed couplings to pop into the holes in the ½-inch tubing to connect the ¼-inch-diameter tubing. Each hole corresponds to a plant you want to water. These barbs are not needed if you run your ½-inch tubing right next to each plant and put an emitter in each hole.

$7 – ¼-inch tubing, 100 feet, cuts easily with pruners. I used plain tubing, but there’s also tubing with holes every so many inches, or tubing of a porous material—soaker tubing.

$4 – Bag of 10 emitters, either 1 gallon per hour or 2, to pop into the holes on the ½-inch tubing. Or, if you use plain ¼-inch tubing extensions, you pop them into the ends of those tubes. You can also install little sprinklers that spray instead of emitters which only drip, but that defeats the idea of saving water by keeping it from becoming airborne and evaporating. See box for gallons per hour calculations.

$2 – Bag of “goof plugs” in case you have punched a hole you don’t want and need to plug it.

$1.50 – Bag of 10 ¼-inch loop stakes for holding the ¼-inch tubing in place.

$1 – end cap, ½-inch. If you don’t have this on the far end of your ½-inch tubing, you just have a holey hose!

                We already had some Teflon tape and a wrench for all the plumbing connections so I didn’t count them.

Because I set up my system for 25 plants, I had to buy multiple packages of emitters, barbs and loop stakes. My total was $90. But remember, I’m saving water.

                If you’d like a timer automatically watering on a schedule, one costs an average of $40. It helps you adjust your watering more precisely. And you can always shut it off temporarily if it rains enough.

drip irrigation timer
A drip irrigation timer is something we added later.

Gallons per hour calculations

Which emitters you chose, 1 or 2 gallons per hour, depends on how much water pressure you have, how quickly your ground soaks up water and how long you want to leave the system on during each watering. You can mix them in the same system if some plants need more water than others.

If your faucet flows at 100 gallons per hour, you could, theoretically, use up to 100 1-gallon or 50 2-gallon per hour emitters.

How much water does your faucet produce per hour? Figure out how many seconds it takes for it to fill a 1-gallon container. Take that amount of time and divide it into the number of seconds in an hour. If it takes 10 seconds to fill, divide 10 into 3,600 seconds in an hour and you have the rate of 360 gallons per hour.


How to be a vegetable gardener in Cheyenne

veggies

My beginner’s garden included green beans, cherry tomatoes, eggplants, peppers and summer squash.

Also published May 15, 2020, in the Wyoming Tribune Eagle.

How to be a vegetable gardener in Cheyenne

By Barb Gorges

Mail-order seed companies report that they are running out of seed—vegetable seeds primarily. Seems like we’re all wanting to take a step towards self-sufficiency this spring when there are so many other aspects of life beyond our control.

Catherine Wissner, University of Wyoming Extension horticulturist for Laramie County, assured me Cheyenne’s garden centers, including the big box stores, have plenty of seeds. And the Laramie County Master Gardeners plan to have their annual plant sale, one way or another, May 31, including a virtual plant sale already in progress, https://www.lcmg.org/.

The UW Extension folks have a variety of videos and recordings about Wyoming gardening available at https://www.uwyo.edu/barnbackyard/live/recordings.html.

While my book on how to garden in Cheyenne won’t be ready for several months, the contents are currently available online at https://cheyennegardengossip.wordpress.com/ as an archive of all my Wyoming Tribune Eagle garden columns since 2012. You can search for information about growing vegetables and it will be suited to Cheyenne and in more detail.

If you’ve gardened elsewhere in the country, there are three things you need to know about vegetable gardening in Cheyenne: use drip irrigation, prepare hail protection and never add lime to our alkaline soils.

If you’ve never gardened before, well, it’s mostly about choosing the right vegetables for our climate and season length, giving plants the right amount of water, and mulching.

2016-6a raised beds 2

Cheyenne gardener Barb Sahl uses several kinds of raised beds. Raised beds can also be made with wooden boards or cinder blocks.

Step 1 – Find a spot for a vegetable bed or containers.

It should be sunny for at least 6 hours a day, preferably morning, and relatively level and within reach of a hose or a drip irrigation system.

Keep the veggies close to your back door so that it is easy to saunter out every day to admire them and pull a couple little weeds.

If the site currently doesn’t even grow weeds well, it could be subsoil left behind by the builders. The soil can be amended and over time, become productive. But for success this season, think raised bed or containers (see my archives).

Also, if this is your first attempt at vegetable gardening, keep the size of the bed reasonable, maybe 4 feet wide (what you can reach across from either side) by 6 or 8 feet long.

Step 2 – Prepare the bed.

I have never used a rototiller. I prefer the (husband with) shovel method. Digging by hand will keep you from creating a bed bigger than you can manage, especially if this is your first garden.

If you have any compostable material, like last year’s tree leaves, lawn mowings not treated with pesticides, vegetable debris from the kitchen or any old plant materials that don’t include weed seeds or invasive roots, you can dig that in.

Dedicated gardeners will send soil samples out for analysis on exactly what the soil needs for growing vegetables. Think about doing that later this season.

Some gardeners work their soil until it’s as fine and chunk free as cocoa powder, but that isn’t necessary—in fact, it’s hard on the soil microbes that can help you. You might want to smooth a row a few inches wide for planting tiny seeds and make sure there aren’t any canyons that will swallow the cucumbers.

Gold Nugget tomatoes

Gold Nugget cherry tomatoes are an early (55 days to maturity), determinate variety. These were grown with seed from Pinetree Garden Seeds, a mail order company in Maine.

Step 3 – Shop for seeds.

If you know any successful gardeners in our area, see if they will gift you some seeds.

Otherwise, you need to read the seed packets carefully. Keep in mind our average last day of frost is around May 25 and our average first day of frost is mid-September. It’s a short season. You need to look for short season vegetables.

Each packet will tell you how many days from seed germination until maturity (harvest). Remember, some seeds take a week or more to germinate. Look for vegetable varieties that are in the range of 45 to 70 days. Next year you can try starting tomatoes indoors or growing them with some kind of season extender like a hoop house or row cover.

Meanwhile, look for tomatoes, eggplants, cucumbers and peppers ready to transplant.

Easy to grow from seed are the squashes, beans, kale, chard and leaf lettuces (not head lettuce).

Step 4 – Plant seeds and transplant plants.

Follow the seed packet directions on when and how to plant. Make sure your soil is moist already.

For transplanting, normally you plant the plant so it sits at the same height as it did in the pot. However, if it’s a tomato that looks a little leggy, you can bury a few inches of its stem.

Step 5 – Mulch.

We use old tree leaves and pesticide-free grass clippings at our house. Straw is good, but not hay or anything with seeds. An inch or two of mulch will keep down the weeds and keep the soil from drying out too fast.

Step 6 – Water.

Catherine said consistency is most important. Once the plants are established, you can let the top inch of soil dry out (test it with your finger) in between thorough waterings, but if you are not consistent with providing enough water, you will not get good yields.

If you seem to have impenetrable clay soils, try watering for a couple minutes, then water elsewhere and then come back 15 minutes later and see if the soil will absorb the rest of the water it needs.

Step 7 – Fertilize.

Seedlings don’t need fertilizer for a few weeks, but vegetables are soon hungry. Organic gardeners use compost—like your mulch as it decays, or “teas” made from soaking compost—read up first. Avoid all manure, Catherine recommended. It tends to be salty (bad for our soils), full of weed seeds and may harbor pathogens. Avoid chemical fertilizers with too much nitrogen too—nitrogen grows great leaves but little if any fruit. Do not use weed and feed products—they will kill your veggies.

Step 8 – Weed.

If you mulch and don’t overwater, you shouldn’t have much of a weed problem. Visit your veggies every day and pull them or use a dandelion digger (don’t hoe) on any little green interlopers. It’s much easier than waiting until the weeds grow roots to Earth’s core and shed seeds across the continent.

Step 8 – Protect.

Everything is out to get your veggies before you can harvest them: frost, wind, hail, antelope, rabbits, insects, diseases. There are preventative and non-chemical actions you can take. Check my archives.

Step 9 – Harvest.

I remember the first summer after I became a Master Gardener. I told my husband, our family’s vegetable grower, that I wanted to try to grow vegetables myself from start to finish. I did, and they had the most incredible flavor.

2019-01 sandra cox vegetable garden

Cheyenne gardener Sandra Cox used large amounts of compost when starting a garden at her new house and had fantastic results.


3 Comments

Starting gardens: find sun, soil, water

2018-03-05PerennialGarden 1byBarbGorges

This perennial garden keeps expanding. The raised bed with the hail guard on top is where we grow the vegetables, the sunniest spot in front or back yard. Photo by Barb Gorges. 

Published in the Wyoming Tribune Eagle Mar. 5, 2018.

By Barb Gorges

Is this the year you’ve decided you’ll spend more time on flowers and vegetables and make that boring expanse of lawn more colorful and edible? Here’s how to start.

Find the sun

Find where the sun shines on your yard and where the shadows are. This is the very first and most important step you must take. If you didn’t notice last year, you can estimate.

See where the shadows of currently leafless trees fall during the day. Find the sunny, south-facing side of your house.

For vegetables you want the sunniest location possible, at least 6 hours of full, summer sun. Do you have overgrown or dying trees and shrubs that need pruning or removal? However, a little shade by late afternoon keeps veggie leaves from temporarily wilting.

Keep vegetable gardens close to the house so it is easier to step out and pull the occasional weed and pick the ripe tomatoes.

Flowers aren’t as picky about sun because there are kinds suited to different light levels: sun, part sun, part shade and full shade. If you desire to grow a certain kind, google its light requirements.

Block the wind

In most residential neighborhoods there are enough obstacles, houses and landscaping, to blunt the wind. But if you are out on the prairie, you might want to put delicate plants in the lee of the barn or plant a windbreak first.

Get the dirt

Soil is anything a plant can stick a root into.

Good soil for vegetables (and other annuals) has lots of microorganisms that help feed the roots. Most vegetables are big feeders. They use lots of nutrients, so you’ll want to dig in compost the first year and then add layers of leaf/plant/kitchen compost mulch after that as needed. No need to dig again in future years.

If you use chemical fertilizer instead (unfortunately limiting good soil microbes), remember to follow the directions. Too much nitrogen gives you leaves and no fruit and too much of any fertilizer gives you sick or dead plants. And remember, Cheyenne has alkaline soils so do not add alkaline amendments like lime and wood ash.

Perennial plants rated for our zone 5 or colder (Zones 3 and 4), especially native plants, are really quite happy with whatever soil is available. If you are trying to grow flowers in the equivalent of pottery clay, gravel pit or sandbox, you might look for native species adapted to those kinds of soil. Or consider growing your plants in a raised bed or container you can fill with better soil.

Water carefully

Here in the West, water is a precious commodity so save money by not throwing it everywhere. If you have a sprinkler system, make sure it isn’t watering pavement.

The new era of home landscaping encourages us to replace our lawns with native perennials because they use less water. Native plants also provide food for birds, bees and butterflies, and habitat for beneficial insects. The Cheyenne Board of Public Utilities is installing a demonstration garden at its headquarters this spring.

But you will need to water a new perennial garden regularly until it gets established, and at other times, so figure out how far you want to lug the hose or stretch a drip irrigation system.

Once established, a native perennial garden not only takes less water than a lawn, but it doesn’t require the purchase of fertilizers, pesticides or gasoline for the mower. Your time can be spent admiring flowers instead of mowing. Although if you convert a large lawn to a meadow, you may want to mow it once a year.

Vegetables are water hogs. The fruits we harvest, especially tomatoes and cucumbers, are mostly water. Unless you like to contemplate life while watering by hand, check out drip irrigation. You can even put a timer on the system.

Sprinklers, on the other hand, waste a lot of water, especially when it evaporates in the heat and wind before it can get to the plants. If you abstain from watering between 9 a.m. and 5 p.m., you’ll lose less to evaporation.

2018-03-05PerennialGarden 3byBarbGorges

It cost me $3000 to have the turf dug up for this garden…and the broken sewer pipe replaced. Photo by Barb Gorges.

Deleting lawn

While you can rent a rototiller to open up an area for planting, I prefer to use a sharp spade. I dig one clump of grass at a time, only about 8-10 inches deep, break and shake off as much soil as possible and put the remaining chunk in the compost bin—or fill in a hole in the remaining lawn.

It’s slow going, but I disturb fewer tree and shrub roots that underlay my entire yard. When I get tired of digging, that means I’ve reached the amount of new garden I have the energy to plant this year. I don’t want gardening to become a chore!

The plants and details

In the six years I’ve been interviewing local gardeners and writing monthly columns, I’ve accumulated a lot of information, from seed starting to native grass lawn alternatives to growing giant pumpkins and native perennials. Go to my website, https://cheyennegardengossip.wordpress.com, and on the right side of the page use the search function or scroll through the list of topics.

If you are using your phone, select “About” from the menu and find the search function and topics at the very bottom of the page.

2018-03-05Coneflower&beebyBarbGorges

I love this kind of garden visitor. Photo by Barb Gorges.


Vegetable growing advice


IMG_6356.JPG

Laramie County Master Gardener Kathy Shreve prepares a trench for seeds in a raised bed set up with soaker hoses. Photo by Barb Gorges.

Published in the Wyoming Tribune Eagle June 4, 2017, “Time to get your garden growing.”


By Barb Gorges

I spent a recent evening in the garden with Kathy Shreve, Laramie County master gardener, reviewing what to know about local vegetable gardening. The topics mentioned here are covered in greater depth in the “gardening” section of the Cheyenne Botanic Gardens website, http://botanic.org, which also has the link to the archive of my previous columns.

Timing

Wait until the end of May or later to transplant tender veggies like tomatoes, eggplants, cucumbers or put them under a season-extending cover like a low tunnel. You can also plant them in containers you can scoot in and out of the garage.

However, Shreve started cabbage and onion plants indoors and planted them before the snow May 18-19 and they were fine. Some vegetables, like members of the cabbage family, don’t mind cold as much.

While peas, cabbage types, lettuces and other greens, can be planted earlier than the end of May, most vegetable seeds planted directly in the garden prefer warmer soil temperatures. Measure with a soil thermometer found at garden centers.

Shreve said we can plant as late as June 20. Plant fast growing crops as late as July if you want a fall harvest.

Location

Keep in mind the vegetable garden needs a minimum of six hours of sun per day, preferably morning sun.

IMG_6357

Shreve transplants cabbages she started indoors. Photo by Barb Gorges.

Transplants

Because of our short growing season, tomatoes and other tender vegetables are started indoors. Always look for the short season varieties of these plants. Shreve said she looks for 80 or fewer “days to maturity.”

If the plant was not outside when you bought it, it will need hardening off. Start with the plant in the shade for two or three hours and day by day increase the amount of sun and the length of exposure by a couple hours. Keep it well watered.

When transplanting, Shreve advises digging a hole for your plant, filling it with water, then letting it drain before planting.

To remove a plant from a plastic pot, turn it upside down with the stem between your forefinger and middle finger. Squeeze the pot to loosen the soil and shake it very, very gently.

If there are a lot of roots, you can gently tease them apart a bit before putting the plant in the hole.

Hold the plant by the root mass so that it will sit in the hole with the soil at the same level of the stem as it was in the pot. Fill soil in around the roots, then tamp the soil gently.

However, tomatoes can be planted deeper since any part of their stem that is underground will sprout roots, the more the better. In fact, Shreve said to pinch off all but three or four leaves and bury the bare stem.

Lastly, keep plants well-watered, not soggy, while they get established. Wait a couple weeks before adding fertilizer to avoid burning the plants.

Mulch

Shreve mulches with certified weed-free straw available at local feed stores, but grass clippings and last year’s leaves can also be used.

Placing mulch 2 to 3 inches deep keeps the soil from drying so fast, shades out weeds and keeps rain and overhead watering from spattering dirt onto plants, which may spread disease. It can also keep hail from bouncing and inflicting damage twice.


IMG_6354

Seed

Root crops, like carrots and beets, don’t transplant well, so you are better off starting them from seed.

While fresh is good, Shreve said she’s had luck with seed seven years old. But the germination rate isn’t going to be great. She might spread carrot seed a little more thickly if that was the case, and it’s easy to thin to the proper spacing (and the thinnings can be tasty).

Because Cheyenne is dry, Shreve plants in a little trench. That way, when moisture comes, it will collect down where the plants are.

Seed packets tell you how deep to plant. The rule of thumb is three to four times deeper than the breadth of the seed. Lay the seed in the bottom of the trench and sprinkle that much dirt on them. Then water well, but gently, so you don’t wash out the seeds. Keep the soil surface moist until the seeds germinate.

Lightly mulch when the seedlings are visible, adding more as the plants get bigger.

Mark rows with popsicle sticks or plastic knives left from picnics.

Water

Once plants are established, let the top 1-2 inches of soil dry out between waterings. Test by sticking your finger in the soil. Water deeply.

Shreve waters every other day using soaker hose and drip irrigation systems, except when it rains. She originally tested her system for 30 minutes to see if water made it to the root depth and decided on 40 minutes.

Water in the morning, or at least make sure leaves are dry before dark.

Bugs and weeds

Mulch should eliminate most of the need to weed. Shreve said to keep up with it—it’s easier to pluck weed seedlings than to have them establish deep roots and go to seed.

For bugs, Shreve said it is easy to Google “what insect is eating my cabbage,” or take the critter, or evidence, to the Laramie County Extension horticulturist, Catherine Wissner. Her office is now out at Laramie County Community College, fourth floor of the new Pathfinder Building.

Never use pesticides until you identify your problem, and then try the least toxic method first. Again, more is not better. Never apply more than the directions indicate.

Slugs—my nemesis—indicate a garden is too wet.

Shreve said to roll newspaper to make 1 to 2-inch-diameter tunnels. Place rolls around affected plants in the evening. By sunrise, the slugs will be inside the rolls to get away from the light and you can dispose of them, rolls and all.

Fertilizer

Never add wood ash or lime to our alkaline soils as those work only on eastern, acidic soils.

Shreve likes slow-release products which are less likely to burn the plants, as are the natural fertilizers. Additionally, compost tea is a good soil conditioner.

Again, more is not better. Shreve uses half of what is directed until she sees how the plants respond.

Over-fertilization of fruit-producing vegetables like tomatoes often keeps them from producing the flowers that become the fruit. Shreve said they need to be stressed a little bit because it gets them thinking about preservation of the species and producing seed, rather than just enjoying life and producing leaves.

“Just leaves” is OK if you are growing leafy vegetables like lettuce, kale, spinach and chard.

Trellis and cage

If you are growing vining vegetables, getting them off the ground means fruits stay cleaner and don’t rot, and they are easier to find and pick. Use old chain link gates, bed springs, or anything else—be creative.

Hog panels make sturdy tomato cages 5 feet high and 2.5 feet in diameter for larger, indeterminate varieties, with chicken wire over the top for hail protection. Otherwise, use jute twine to loosely tie the stem to a bamboo stake.

Add flowers

Adding annual flowers like alyssum, marigolds and sunflowers, or herbs including dill and oregano, attracts pollinators and beneficial insects to your garden.


Straw bales conquer garden problems

2016-8 straw bale 1, Susan Carlson, by Barb Gorges

Laramie County Master Gardener Susan Carlson shows off peas growing in her straw bale garden. The spruce trees protect the garden from north wind and the shade cloth protects the delicate lettuce in the rest of the garden from too much sun. Photo by Barb Gorges.

Published Aug. 14, 2016, in the Wyoming Tribune Eagle, “Straw bales conquer many garden problems.”

By Barb Gorges

Did the thought of the work involved in starting a vegetable garden keep you from having one this year? Did time for all that rototilling or digging in of compost never materialize? Or maybe you tried a garden in our clay soils and results were poor?

2016-8 Straw Bale Gardens cover

Straw Bale Gardens, by Joel Karsten, Cool Springs Press.

Susan Carlson, a Laramie County Master Gardener, can recommend a solution: straw bale gardening. Her stepson, who lives in Minnesota, brought her the book by Minnesota native Joel Karsten describing his miraculous method.

This is the second season Carlson has used rectangular straw bales for vegetables and her results look good. She also included flowers.

The idea is that a straw bale is compost waiting to happen. Before the growing season begins, over a couple weeks, you add water and a little fertilizer—organic or inorganic—and it will activate an army of bacteria. The bacteria break down the straw, turning it into just what plants need. Plants can be inserted into the bale or seeds can be started in a little potting soil placed on top.

The bale is like a container or raised bed held together with baling twine. You can set it anywhere, even on a driveway. You don’t prepare the ground underneath.

And, depending on how clean the straw is, you will have few weeds, or wheat or oat sprouts, that can’t be easily removed by hand. You’ll have more sprouts if you accidently bought hay—which includes the heads of grain—instead of straw, which is just the stems.

Straw bales might also be the solution to vegetable plant diseases that persist in soil. Gardeners are always advised not to grow the same family of vegetables (especially the tomato-eggplant-pepper family) in the same spot more than once every three years. You can start a fresh bale each year, although Carlson managed to keep her bales intact for a second year.

Carlson studied Karsten’s book, “Straw Bale Gardens.” Here’s what she did:

First, obviously, she found straw bales.

I checked a local farm and ranch supply store and their regular bale, about 3 feet long and 60 pounds, runs about $7. Avoid the super-compressed bales.

A bale bought in the fall from a farmer should be cheaper than in the spring, after they’ve had to store them all winter. In fall, you can put your bale outside to weather.

If you’ve had problems with mice or voles, as Carlson has, lay chicken wire or hardware cloth down first. Cut a piece big enough to fold up and protect several inches of the sides of the bale.

2016-8 straw bale 2, set up, by Barb Gorges

Carlson’s straw bale garden consists of five bales forming a u-shape. They are planted with (from left) haricot vert green beans, cabbage, a tomato, lettuces, petunias and edible pod peas. Photo by Barb Gorges.

Lay out your bale prickliest side up, and so the sides wrapped with twine not against the ground. Carlson bought five bales and formed them into a u-shape to fit within an area fenced to keep out her dogs.

Because she planned to grow beans, Carlson made a trellis as well. She wedged two bales, lying end to end, between two 5-foot steel “T-post” fence posts (about $5 each) and then strung wire at about 10 and 20 inches above the bales. She can add more wire if the plants get taller. Karsten recommends 14-gauge electric fence wire (but you won’t be plugging it in).

On the ground inside the u-shape of bales (or between your rows), Carlson laid landscape fabric. You could use some other material to keep light from germinating weed seeds, like a layer of thick straw, cardboard, wood, wood mulch, etc.

Next, Carlson “conditioned” the bales, starting about two weeks before our last frost date, which is around May 22, though you can start a week earlier because the bales form a warm environment.

The first step here is to find cheap lawn fertilizer with at least 20 percent nitrogen content as Carlson did the first year. Do not use one that is slow-release or that contains herbicides.

You can also use organic fertilizers, like bone or feather meal, or very well-composted manure, but you need to use six times more than the amounts given for inorganic fertilizer. The second season, Carlson said, she is having good results using Happy Frog packaged organic fertilizer, but using much less since the bales were conditioned once already last year.

The conditioning regimen begins the first day with a half cup of inorganic fertilizer (or six times more organic) per bale sprinkled evenly all over the top and then watered in with your hose sprayer until all of it has moved into the bale and the bale is waterlogged, writes Karsten.

The next day you skip the fertilizer and water the bale again. Karsten suggests using water that’s been sitting out for a while so it isn’t as cold as it is straight out of the tap.

Days three through six you alternate between fertilizer-and-water days and water-only days.

Days seven through nine you water in a quarter cup of fertilizer per bale each day. The bales should be cooking by now and feel a little warmer on the outside.

On day 10, add a cup of 10-10-10 garden fertilizer. The numbers mean 10 percent nitrogen, 10 percent phosphorus and 10 percent potassium.

Next, lay out your soaker hoses on top of the bales if you are going to use drip irrigation as Carlson has.

On day 12, Carlson transplanted one cherry tomato plant directly into the bale, wedging it in. Smaller plants are easier to plant than large ones and will soon catch up.

“Bacteria are breaking down the inside of the bale and making this nice environment,” said Carlson.

2016-8 straw bale 4 beans by Barb Gorges

Carlson’s Haricot vert beans. Photo by Barb Gorges.

Mostly, Carlson wanted a salad garden and so she started everything else from seed: edible pod peas, Haricot vert beans (a type of tiny French green bean), lemon cucumbers, broccoli, spinach and various lettuces.

She packed a couple of inches of sterile potting soil (not garden soil) into the tops of the bales in which to plant the seeds. The warmth of the composting straw got them off to a good start.

She added shade cloth overhead to protect the lettuces from too much sun and started cutting romaine and butterhead lettuce by mid-June.

Carlson also used shade cloth on the west side fence to keep the wind from drying out the bales too quickly.

And there you have it, a vegetable garden—or a flower garden if you prefer—ready to grow. All you need to do then is to garden as you normally would: enough water, fertilizer once a month, and pull the occasional weed that may sprout, or pick off any little slugs or insects.

Maybe because of our dry western climate, Carlson was able to use her bales this second year. The bales shrank a little so she patched the gaps between bales with bits of chicken wire on the sides and filled them with potting soil.

One question is what to do with the old bales. They are great compost for conventional garden beds. Carlson reached into the side of one bale and showed me lovely black soil. If you don’t have any conventional garden beds to add it to, someone else would be happy to take the compost off your hands.

“This isn’t the prettiest thing,” Carlson says of her straw bale garden, “but when it starts growing, you don’t even look at the bales.”

2016-8 straw bale 3, detail, by Barb Gorges

While most straw bale gardeners start with fresh bales each spring, Carlson was able to use hers for a second season. She pulled away a little straw on the side of this bale and discovered it is full of rich compost. A soaker hose keeps the vegetables watered. The green steel fence post is part of the trellis system. Photo courtesy Barb Gorges.