Cheyenne Garden Gossip

Gardening on the high plains of southeastern Wyoming


Vegetable growing advice


IMG_6356.JPG

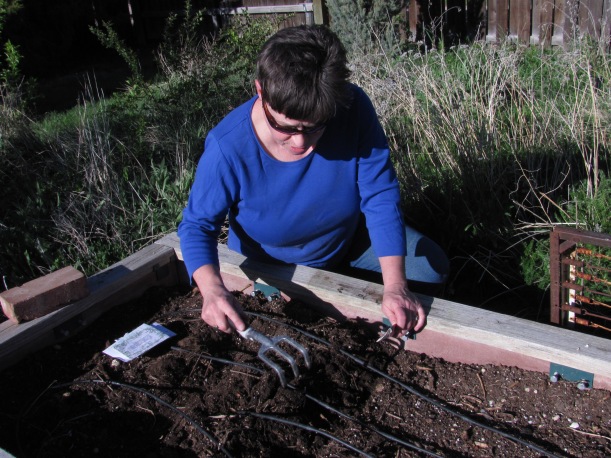
Laramie County Master Gardener Kathy Shreve prepares a trench for seeds in a raised bed set up with soaker hoses. Photo by Barb Gorges.

Published in the Wyoming Tribune Eagle June 4, 2017, “Time to get your garden growing.”


By Barb Gorges

I spent a recent evening in the garden with Kathy Shreve, Laramie County master gardener, reviewing what to know about local vegetable gardening. The topics mentioned here are covered in greater depth in the “gardening” section of the Cheyenne Botanic Gardens website, http://botanic.org, which also has the link to the archive of my previous columns.

Timing

Wait until the end of May or later to transplant tender veggies like tomatoes, eggplants, cucumbers or put them under a season-extending cover like a low tunnel. You can also plant them in containers you can scoot in and out of the garage.

However, Shreve started cabbage and onion plants indoors and planted them before the snow May 18-19 and they were fine. Some vegetables, like members of the cabbage family, don’t mind cold as much.

While peas, cabbage types, lettuces and other greens, can be planted earlier than the end of May, most vegetable seeds planted directly in the garden prefer warmer soil temperatures. Measure with a soil thermometer found at garden centers.

Shreve said we can plant as late as June 20. Plant fast growing crops as late as July if you want a fall harvest.

Location

Keep in mind the vegetable garden needs a minimum of six hours of sun per day, preferably morning sun.

IMG_6357

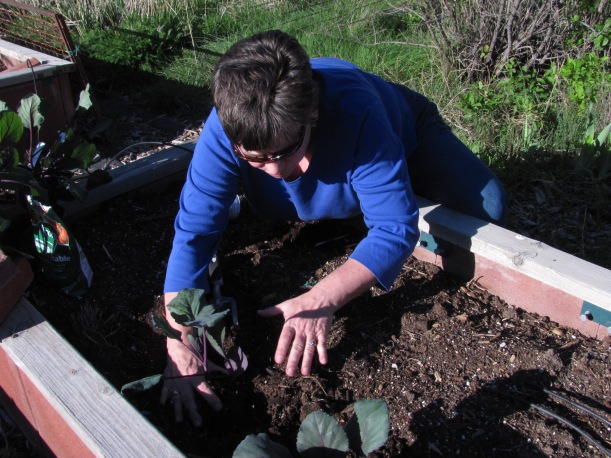
Shreve transplants cabbages she started indoors. Photo by Barb Gorges.

Transplants

Because of our short growing season, tomatoes and other tender vegetables are started indoors. Always look for the short season varieties of these plants. Shreve said she looks for 80 or fewer “days to maturity.”

If the plant was not outside when you bought it, it will need hardening off. Start with the plant in the shade for two or three hours and day by day increase the amount of sun and the length of exposure by a couple hours. Keep it well watered.

When transplanting, Shreve advises digging a hole for your plant, filling it with water, then letting it drain before planting.

To remove a plant from a plastic pot, turn it upside down with the stem between your forefinger and middle finger. Squeeze the pot to loosen the soil and shake it very, very gently.

If there are a lot of roots, you can gently tease them apart a bit before putting the plant in the hole.

Hold the plant by the root mass so that it will sit in the hole with the soil at the same level of the stem as it was in the pot. Fill soil in around the roots, then tamp the soil gently.

However, tomatoes can be planted deeper since any part of their stem that is underground will sprout roots, the more the better. In fact, Shreve said to pinch off all but three or four leaves and bury the bare stem.

Lastly, keep plants well-watered, not soggy, while they get established. Wait a couple weeks before adding fertilizer to avoid burning the plants.

Mulch

Shreve mulches with certified weed-free straw available at local feed stores, but grass clippings and last year’s leaves can also be used.

Placing mulch 2 to 3 inches deep keeps the soil from drying so fast, shades out weeds and keeps rain and overhead watering from spattering dirt onto plants, which may spread disease. It can also keep hail from bouncing and inflicting damage twice.


IMG_6354

Seed

Root crops, like carrots and beets, don’t transplant well, so you are better off starting them from seed.

While fresh is good, Shreve said she’s had luck with seed seven years old. But the germination rate isn’t going to be great. She might spread carrot seed a little more thickly if that was the case, and it’s easy to thin to the proper spacing (and the thinnings can be tasty).

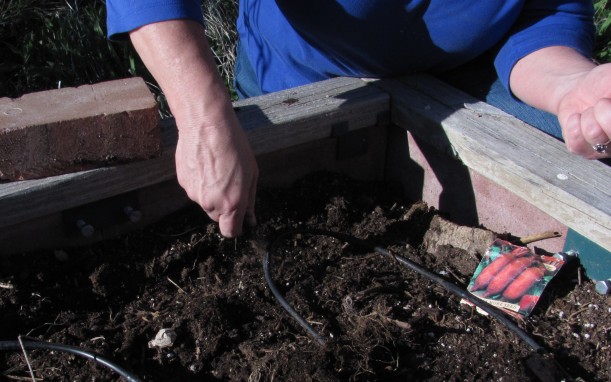
Because Cheyenne is dry, Shreve plants in a little trench. That way, when moisture comes, it will collect down where the plants are.

Seed packets tell you how deep to plant. The rule of thumb is three to four times deeper than the breadth of the seed. Lay the seed in the bottom of the trench and sprinkle that much dirt on them. Then water well, but gently, so you don’t wash out the seeds. Keep the soil surface moist until the seeds germinate.

Lightly mulch when the seedlings are visible, adding more as the plants get bigger.

Mark rows with popsicle sticks or plastic knives left from picnics.

Water

Once plants are established, let the top 1-2 inches of soil dry out between waterings. Test by sticking your finger in the soil. Water deeply.

Shreve waters every other day using soaker hose and drip irrigation systems, except when it rains. She originally tested her system for 30 minutes to see if water made it to the root depth and decided on 40 minutes.

Water in the morning, or at least make sure leaves are dry before dark.

Bugs and weeds

Mulch should eliminate most of the need to weed. Shreve said to keep up with it—it’s easier to pluck weed seedlings than to have them establish deep roots and go to seed.

For bugs, Shreve said it is easy to Google “what insect is eating my cabbage,” or take the critter, or evidence, to the Laramie County Extension horticulturist, Catherine Wissner. Her office is now out at Laramie County Community College, fourth floor of the new Pathfinder Building.

Never use pesticides until you identify your problem, and then try the least toxic method first. Again, more is not better. Never apply more than the directions indicate.

Slugs—my nemesis—indicate a garden is too wet.

Shreve said to roll newspaper to make 1 to 2-inch-diameter tunnels. Place rolls around affected plants in the evening. By sunrise, the slugs will be inside the rolls to get away from the light and you can dispose of them, rolls and all.

Fertilizer

Never add wood ash or lime to our alkaline soils as those work only on eastern, acidic soils.

Shreve likes slow-release products which are less likely to burn the plants, as are the natural fertilizers. Additionally, compost tea is a good soil conditioner.

Again, more is not better. Shreve uses half of what is directed until she sees how the plants respond.

Over-fertilization of fruit-producing vegetables like tomatoes often keeps them from producing the flowers that become the fruit. Shreve said they need to be stressed a little bit because it gets them thinking about preservation of the species and producing seed, rather than just enjoying life and producing leaves.

“Just leaves” is OK if you are growing leafy vegetables like lettuce, kale, spinach and chard.

Trellis and cage

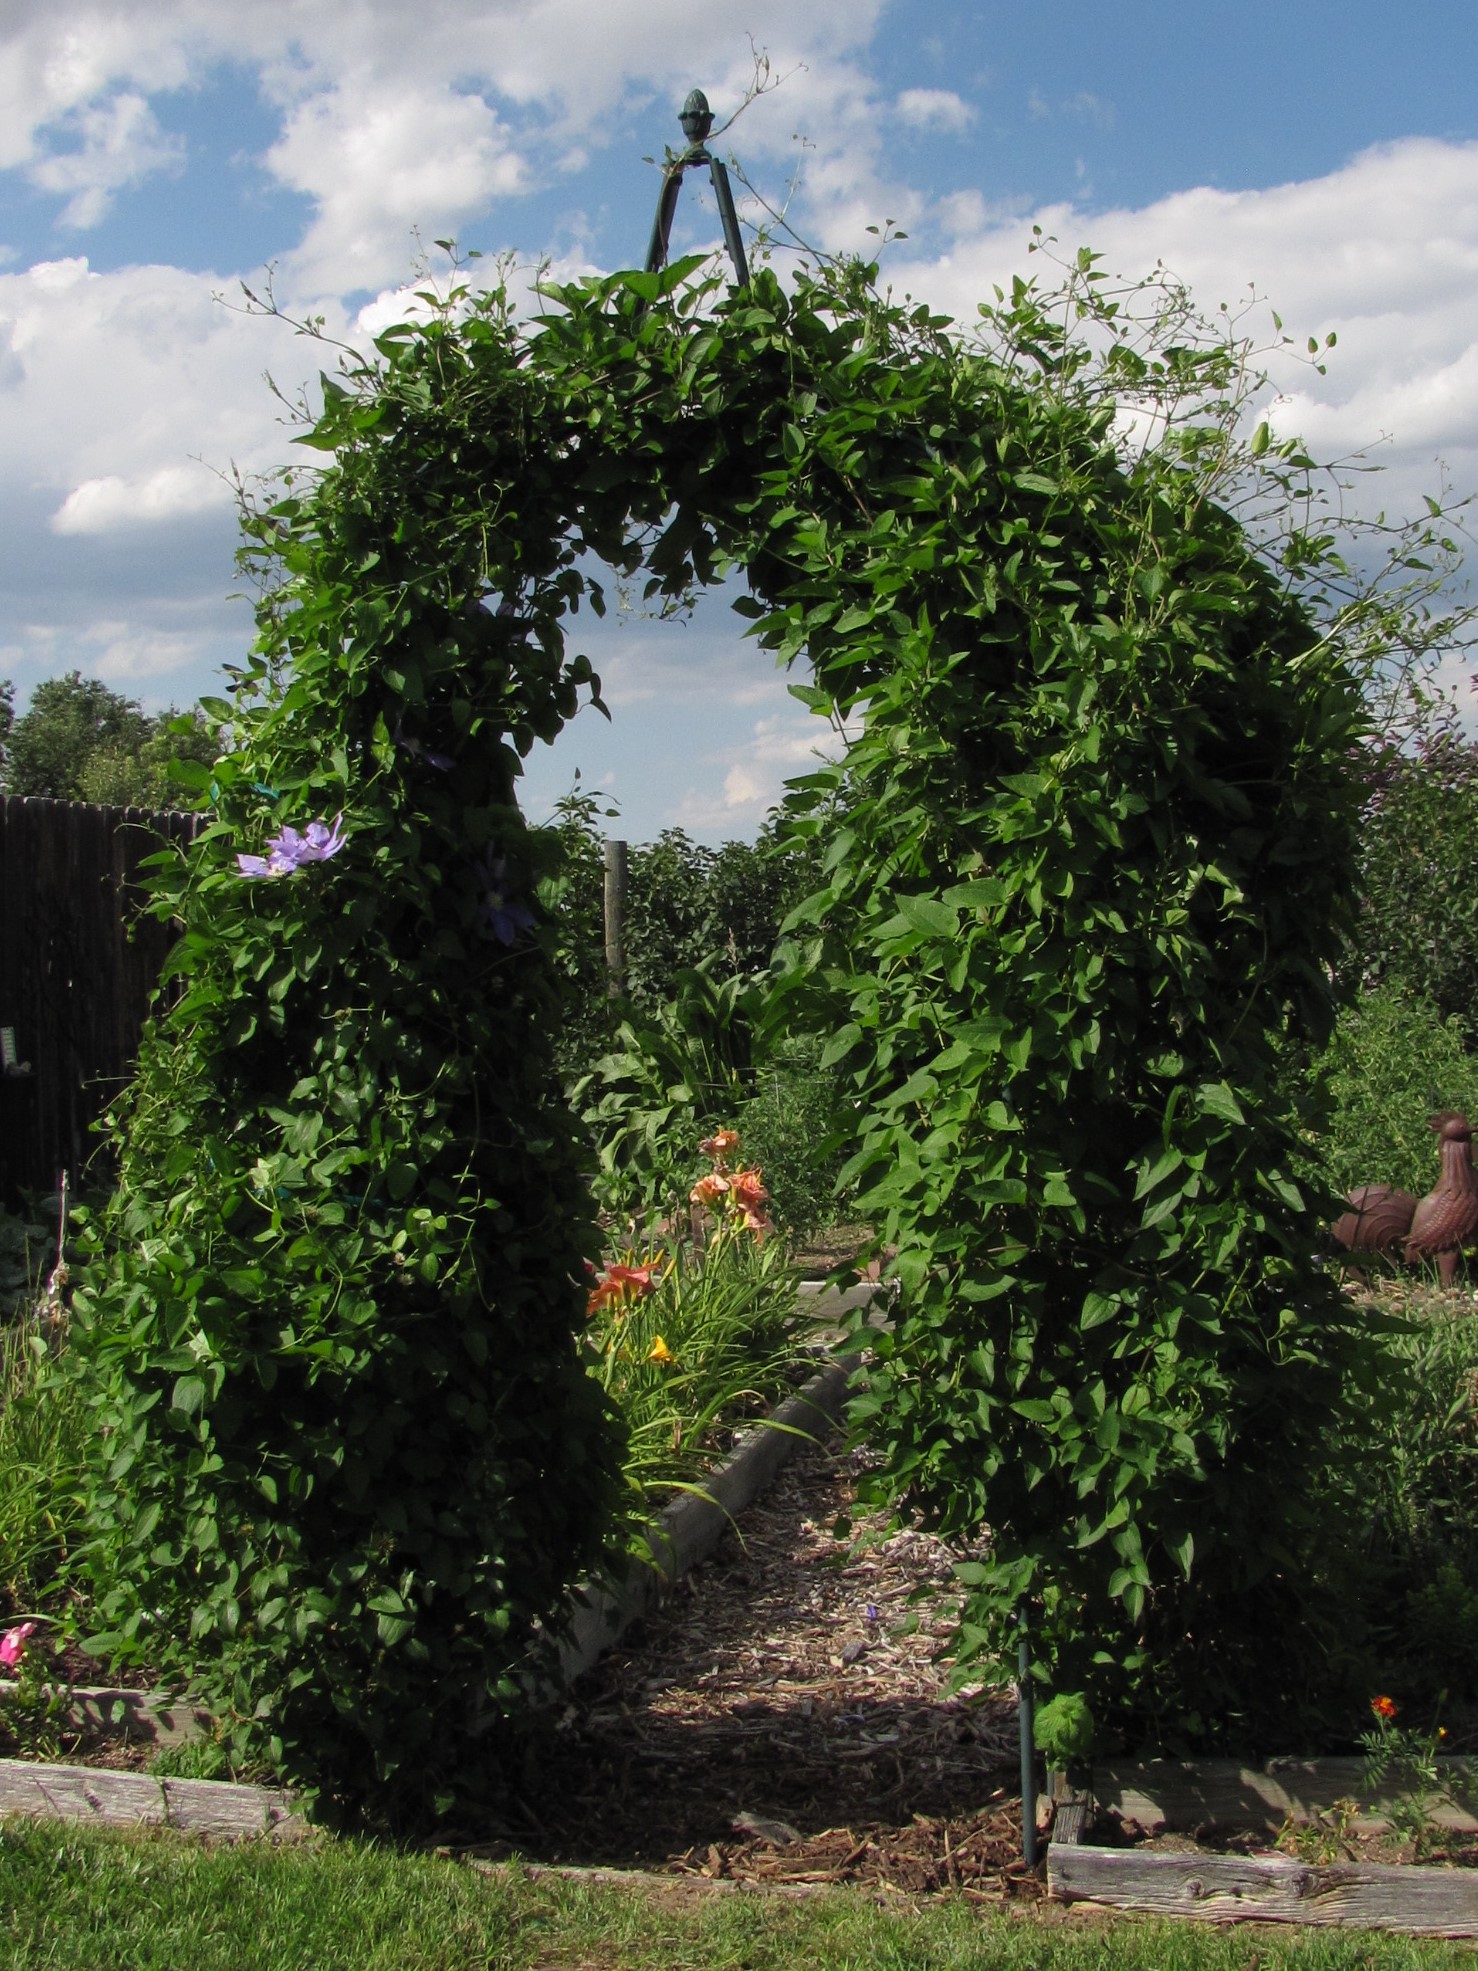
If you are growing vining vegetables, getting them off the ground means fruits stay cleaner and don’t rot, and they are easier to find and pick. Use old chain link gates, bed springs, or anything else—be creative.

Hog panels make sturdy tomato cages 5 feet high and 2.5 feet in diameter for larger, indeterminate varieties, with chicken wire over the top for hail protection. Otherwise, use jute twine to loosely tie the stem to a bamboo stake.

Add flowers

Adding annual flowers like alyssum, marigolds and sunflowers, or herbs including dill and oregano, attracts pollinators and beneficial insects to your garden.


Straw bales conquer garden problems

2016-8 straw bale 1, Susan Carlson, by Barb Gorges

Laramie County Master Gardener Susan Carlson shows off peas growing in her straw bale garden. The spruce trees protect the garden from north wind and the shade cloth protects the delicate lettuce in the rest of the garden from too much sun. Photo by Barb Gorges.

Published Aug. 14, 2016, in the Wyoming Tribune Eagle, “Straw bales conquer many garden problems.”

By Barb Gorges

Did the thought of the work involved in starting a vegetable garden keep you from having one this year? Did time for all that rototilling or digging in of compost never materialize? Or maybe you tried a garden in our clay soils and results were poor?

2016-8 Straw Bale Gardens cover

Straw Bale Gardens, by Joel Karsten, Cool Springs Press.

Susan Carlson, a Laramie County Master Gardener, can recommend a solution: straw bale gardening. Her stepson, who lives in Minnesota, brought her the book by Minnesota native Joel Karsten describing his miraculous method.

This is the second season Carlson has used rectangular straw bales for vegetables and her results look good. She also included flowers.

The idea is that a straw bale is compost waiting to happen. Before the growing season begins, over a couple weeks, you add water and a little fertilizer—organic or inorganic—and it will activate an army of bacteria. The bacteria break down the straw, turning it into just what plants need. Plants can be inserted into the bale or seeds can be started in a little potting soil placed on top.

The bale is like a container or raised bed held together with baling twine. You can set it anywhere, even on a driveway. You don’t prepare the ground underneath.

And, depending on how clean the straw is, you will have few weeds, or wheat or oat sprouts, that can’t be easily removed by hand. You’ll have more sprouts if you accidently bought hay—which includes the heads of grain—instead of straw, which is just the stems.

Straw bales might also be the solution to vegetable plant diseases that persist in soil. Gardeners are always advised not to grow the same family of vegetables (especially the tomato-eggplant-pepper family) in the same spot more than once every three years. You can start a fresh bale each year, although Carlson managed to keep her bales intact for a second year.

Carlson studied Karsten’s book, “Straw Bale Gardens.” Here’s what she did:

First, obviously, she found straw bales.

I checked a local farm and ranch supply store and their regular bale, about 3 feet long and 60 pounds, runs about $7. Avoid the super-compressed bales.

A bale bought in the fall from a farmer should be cheaper than in the spring, after they’ve had to store them all winter. In fall, you can put your bale outside to weather.

If you’ve had problems with mice or voles, as Carlson has, lay chicken wire or hardware cloth down first. Cut a piece big enough to fold up and protect several inches of the sides of the bale.

2016-8 straw bale 2, set up, by Barb Gorges

Carlson’s straw bale garden consists of five bales forming a u-shape. They are planted with (from left) haricot vert green beans, cabbage, a tomato, lettuces, petunias and edible pod peas. Photo by Barb Gorges.

Lay out your bale prickliest side up, and so the sides wrapped with twine not against the ground. Carlson bought five bales and formed them into a u-shape to fit within an area fenced to keep out her dogs.

Because she planned to grow beans, Carlson made a trellis as well. She wedged two bales, lying end to end, between two 5-foot steel “T-post” fence posts (about $5 each) and then strung wire at about 10 and 20 inches above the bales. She can add more wire if the plants get taller. Karsten recommends 14-gauge electric fence wire (but you won’t be plugging it in).

On the ground inside the u-shape of bales (or between your rows), Carlson laid landscape fabric. You could use some other material to keep light from germinating weed seeds, like a layer of thick straw, cardboard, wood, wood mulch, etc.

Next, Carlson “conditioned” the bales, starting about two weeks before our last frost date, which is around May 22, though you can start a week earlier because the bales form a warm environment.

The first step here is to find cheap lawn fertilizer with at least 20 percent nitrogen content as Carlson did the first year. Do not use one that is slow-release or that contains herbicides.

You can also use organic fertilizers, like bone or feather meal, or very well-composted manure, but you need to use six times more than the amounts given for inorganic fertilizer. The second season, Carlson said, she is having good results using Happy Frog packaged organic fertilizer, but using much less since the bales were conditioned once already last year.

The conditioning regimen begins the first day with a half cup of inorganic fertilizer (or six times more organic) per bale sprinkled evenly all over the top and then watered in with your hose sprayer until all of it has moved into the bale and the bale is waterlogged, writes Karsten.

The next day you skip the fertilizer and water the bale again. Karsten suggests using water that’s been sitting out for a while so it isn’t as cold as it is straight out of the tap.

Days three through six you alternate between fertilizer-and-water days and water-only days.

Days seven through nine you water in a quarter cup of fertilizer per bale each day. The bales should be cooking by now and feel a little warmer on the outside.

On day 10, add a cup of 10-10-10 garden fertilizer. The numbers mean 10 percent nitrogen, 10 percent phosphorus and 10 percent potassium.

Next, lay out your soaker hoses on top of the bales if you are going to use drip irrigation as Carlson has.

On day 12, Carlson transplanted one cherry tomato plant directly into the bale, wedging it in. Smaller plants are easier to plant than large ones and will soon catch up.

“Bacteria are breaking down the inside of the bale and making this nice environment,” said Carlson.

2016-8 straw bale 4 beans by Barb Gorges

Carlson’s Haricot vert beans. Photo by Barb Gorges.

Mostly, Carlson wanted a salad garden and so she started everything else from seed: edible pod peas, Haricot vert beans (a type of tiny French green bean), lemon cucumbers, broccoli, spinach and various lettuces.

She packed a couple of inches of sterile potting soil (not garden soil) into the tops of the bales in which to plant the seeds. The warmth of the composting straw got them off to a good start.

She added shade cloth overhead to protect the lettuces from too much sun and started cutting romaine and butterhead lettuce by mid-June.

Carlson also used shade cloth on the west side fence to keep the wind from drying out the bales too quickly.

And there you have it, a vegetable garden—or a flower garden if you prefer—ready to grow. All you need to do then is to garden as you normally would: enough water, fertilizer once a month, and pull the occasional weed that may sprout, or pick off any little slugs or insects.

Maybe because of our dry western climate, Carlson was able to use her bales this second year. The bales shrank a little so she patched the gaps between bales with bits of chicken wire on the sides and filled them with potting soil.

One question is what to do with the old bales. They are great compost for conventional garden beds. Carlson reached into the side of one bale and showed me lovely black soil. If you don’t have any conventional garden beds to add it to, someone else would be happy to take the compost off your hands.

“This isn’t the prettiest thing,” Carlson says of her straw bale garden, “but when it starts growing, you don’t even look at the bales.”

2016-8 straw bale 3, detail, by Barb Gorges

While most straw bale gardeners start with fresh bales each spring, Carlson was able to use hers for a second season. She pulled away a little straw on the side of this bale and discovered it is full of rich compost. A soaker hose keeps the vegetables watered. The green steel fence post is part of the trellis system. Photo courtesy Barb Gorges.


Trellis and vine

Trellis and clematisPublished Nov. 1, 2015, in the Wyoming Tribune Eagle, “Trellis and vine: A guide to vertical beauty for Cheyenne gardens”

Story and photos by Barb Gorges

Once the leaves are gone for the winter, we have five or more months to admire the structure of deciduous tree trunks and branches.

So how about adding more vertical interest to your garden or the side of your house with a trellis?

The purpose of a trellis is to get vining plants off the ground, which is handy in the vegetable garden. The simplest methods involve stakes, string and wire cages. But these are temporary.

Instead, let’s look at more permanent trellis ideas used with ornamental vines.

Some trellises are attached to walls, some are free-standing, and some are formed into arbors, meant to be walked under. Some can even be sculptural parts of dead trees or scrap metal. Or perhaps one of the porch posts will do.

Lattice trellis

David Mullikin built this trellis from lattice panels. It supports several different vines.

Sometimes, the desire for a trellis comes first, rather than the desire to grow a vining plant. Is there a plain wall or fence that needs something to dress it up? Is there a view you would like to block? Is there a view you would like to frame with an arbor? Are you looking for some shade? Need a little height to give your garden some pizazz?

Trellises with engineered straight lines and perfect curves can offer contrast to natural vine shapes. Trellises with a less formal structure can blend in with nature.

As you drive around town this winter, look for trellises. Some are obviously the kind you buy, the simple fan shapes, lattice panels or ladder shapes. But there is some original artwork out there.

Wood is the easiest for most of us to build with, but if you are thinking long-term, be sure to use wood that will endure, like cedar. You don’t want to get trapped into having to paint your trellis, especially if you are contemplating a perennial vine that adds growth from year to year. But if the vine gets cut back annually, re-painting might be possible.

Car spring trellis

Bruce Keating’s unique trellis, made from an old car spring, bounces in the wind.

Metal is the best. Wrought iron looks good for a long time and it is sturdy enough for heavier vines.

Or how about pipe? Copper looks really nice and might not be so hard to work with, although you don’t want it to be publicly visible or someone will steal it for its cash value.

Bedspring trellis

Jeff and Mary Weinstein attached box springs to their fence to support grape vines.

But perhaps you aren’t a welder. Then it is time to think creatively about repurposing. My friends Mary and Jeff Weinstein had an old box spring they needed to dispose of. After removing the cloth and wood, the springs are attached to their wood fence and covered by their grape vine.

An arbor or pergola is roof-like. It can include sides that are trellises or just the support posts. The roof can be flat or arched. Short arbors form a doorway from one area of the garden to another. Martha Mullikin, a Laramie County master gardener, makes sure her arbors frame views, even a focal point as simple as a container of bright annuals. Despite her several arbors being made of different materials, she chose them all to be flat-topped, echoing the same form.

2015-11Keating Victorian rose temple 4 by Barb Gorges

Bruce Keating welded this Victorian rose temple together from scrap metal and trellises.

More elaborate is the “Victorian Rose Temple” in Bruce and Carla Keating’s garden that Bruce welded, offering support for climbing roses on all sides. Plus it is a shady place to sit.

Recommended vines

As artful as a trellis may be, it needs a vine. I asked Susan Carlson, also a Laramie County master gardener, for her list of recommendations for our area, and I also checked the Cheyenne Botanic Gardens website’s handout, “Vines for the High Plains Landscape,” available at www.botanic.org, under “Gardening Tips.”

Susan said perennial vines are not going to cover the new trellis at once.

“Annual sweet peas and morning glories can act as filler for a few years where slower growing vines are planted. It takes a few years for the roots to become established.”

And she had some advice on where to plant vines.

“Some protection from wind would be beneficial, she said. “I have vines on all sides of the house, except the west.”

wooden arbor

Martha Mullikin’s arbor, adorned with a new clematis, frames a view of her yard.

As I researched each of the recommended vines, I noted they prefer sunny to partly sunny locations. All vines flower, some more noticeably than others. Except for grapes and hops, any fruit produced is appropriate for birds, not people. All vines mentioned are perennial, except morning glory and annual sweet pea.

Trumpet Vine (Campsis radicans)

Orange-red flowers attract hummingbirds. It can be an aggressive grower. Flowers on new wood, so it can be pruned in early spring without affecting blooming.

Clematis species (Clematis spp.)

Needs to keep its roots cool, either shaded by low growing perennials, mulch, or a rock. Many species and varieties are available with different growth habits. Recommended for Cheyenne:

Clematis

Clematis

–Jackmanii—purple flowers, spring & early summer blooming, can be pruned in early spring.

–Henryi—white flowers, blooms in June on last year’s wood, blooms again later on new wood.

–Nelly Moser—pink flowers, late spring and summer. Prune no more than top third.

–Sweet Autumn—white flowers bloom on new wood so prune after blooming. Native and very hardy.

Hops (Humulus lupus)

Odd, but interesting green flowers. It dies back after frost and grows new shoots from the roots in spring. Hops are an ingredient in many beers.

Morning glory

Morning glory (annual)

Morning Glory (annual) (Ipomea purpurea)

Blue-flowered varieties are most popular. Blooms most prolifically beginning in late summer. Needs lots of sun and water. Can be seeded directly when soil temperature is 60 degrees, but speed things up by starting inside three weeks early. Prefers poor soil. Supposedly grows 8 feet long but mine went 18 feet this summer. Grow multiple vines in each location.

Perennial Sweet Pea (Lathyrus latifolius)

Purplish-pink flowers fade to white and are not fragrant. Blooms mid-season. A low water and low maintenance plant. Seeds are poisonous.

Sweet Pea (annual) (Lathyrus odoratus)

Fragrant blue, pink, purple and white flowers. Prefers cool, but sunny locations and lots of water. Plant seeds up to 3 weeks before last spring frost.

Kintzley’s Ghost Honeysuckle (Lonicera reticulate)

Yellow flowers in late spring, but large, silvery leaves are its hallmark. First propagated and grown by the Kintzley family in Iowa in the 1880s and rediscovered in Fort Collins and propagated by Scott Skogerboe.

Trumpet Honeysuckle (Lonicera sempervirens)

Red trumpet-shaped flowers bloom much of the summer. Blooms on previous year’s wood, so prune after flowering. Japanese honeysuckle is less hardy here, but is considered an invasive problem in 29 eastern states.

Virginia creeper

Virginia creeper

Virginia Creeper (Parthenocissus quinquefolia)

Flowers are not noticeable, but the birds love the berries and drop seeds that sprout all over my yard. Leaves turn red in fall. Little disks allow vines to adhere to walls, a problem when removing them.

Silver lace vine

Silver lace vine

Silver Lace Vine (Polygonum aubertii)

White flowers bloom in late summer, early fall, and well into October this year, Martha Mullikin told me. It is considered a relatively fast and hardy grower.

Climbing Roses (Rosa spp.)

Technically, climbing roses don’t twine around or attach themselves to trellises, but they can use the support.

Grape arbor

A grape arbor marks the entrance to Martha Mullikin’s vegetable garden.

American Grape (Vitus labrusca)

scrap metal arbor

Bruce Keating’s scrap metal arbor, festooned with clematis, makes a gateway to the garden.

Table grape varieties that do well in our area, according to the Cheyenne Botanic Gardens’ tip sheet, include Concord, Valiant, Reliance, Himrod and Swenson Red.