
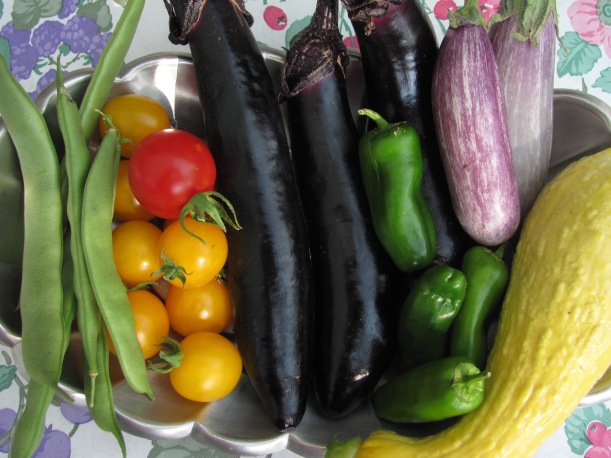
My beginner’s garden included green beans, cherry tomatoes, eggplants, peppers and summer squash.
- Check out Laramie County Master Gardeners’ Virtual Plant Sale at https://www.lcmg.org/ now through May 31, 2020.
- The Seed Library at the Laramie County Library will mail you seeds, https://lclsonline.org/?s=Seed+library (spring 2020).
Also published May 15, 2020, in the Wyoming Tribune Eagle.
How to be a vegetable gardener in Cheyenne
By Barb Gorges
Mail-order seed companies report that they are running out of seed—vegetable seeds primarily. Seems like we’re all wanting to take a step towards self-sufficiency this spring when there are so many other aspects of life beyond our control.
Catherine Wissner, University of Wyoming Extension horticulturist for Laramie County, assured me Cheyenne’s garden centers, including the big box stores, have plenty of seeds. And the Laramie County Master Gardeners plan to have their annual plant sale, one way or another, May 31, including a virtual plant sale already in progress, https://www.lcmg.org/.
The UW Extension folks have a variety of videos and recordings about Wyoming gardening available at https://www.uwyo.edu/barnbackyard/live/recordings.html.
While my book on how to garden in Cheyenne won’t be ready for several months, the contents are currently available online at https://cheyennegardengossip.wordpress.com/ as an archive of all my Wyoming Tribune Eagle garden columns since 2012. You can search for information about growing vegetables and it will be suited to Cheyenne and in more detail.
If you’ve gardened elsewhere in the country, there are three things you need to know about vegetable gardening in Cheyenne: use drip irrigation, prepare hail protection and never add lime to our alkaline soils.
If you’ve never gardened before, well, it’s mostly about choosing the right vegetables for our climate and season length, giving plants the right amount of water, and mulching.
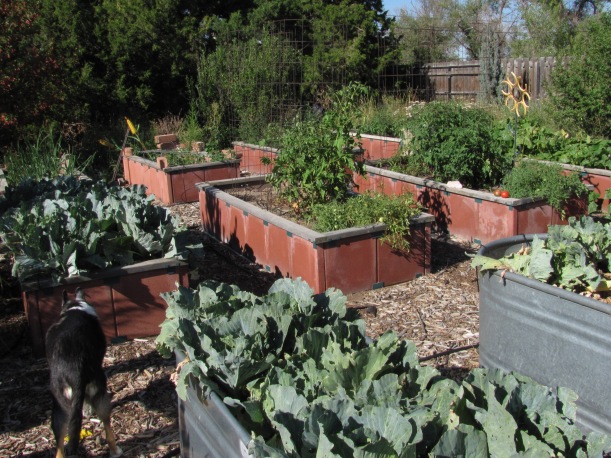
Cheyenne gardener Barb Sahl uses several kinds of raised beds. Raised beds can also be made with wooden boards or cinder blocks.
Step 1 – Find a spot for a vegetable bed or containers.
It should be sunny for at least 6 hours a day, preferably morning, and relatively level and within reach of a hose or a drip irrigation system.
Keep the veggies close to your back door so that it is easy to saunter out every day to admire them and pull a couple little weeds.
If the site currently doesn’t even grow weeds well, it could be subsoil left behind by the builders. The soil can be amended and over time, become productive. But for success this season, think raised bed or containers (see my archives).
Also, if this is your first attempt at vegetable gardening, keep the size of the bed reasonable, maybe 4 feet wide (what you can reach across from either side) by 6 or 8 feet long.
Step 2 – Prepare the bed.
I have never used a rototiller. I prefer the (husband with) shovel method. Digging by hand will keep you from creating a bed bigger than you can manage, especially if this is your first garden.
If you have any compostable material, like last year’s tree leaves, lawn mowings not treated with pesticides, vegetable debris from the kitchen or any old plant materials that don’t include weed seeds or invasive roots, you can dig that in.
Dedicated gardeners will send soil samples out for analysis on exactly what the soil needs for growing vegetables. Think about doing that later this season.
Some gardeners work their soil until it’s as fine and chunk free as cocoa powder, but that isn’t necessary—in fact, it’s hard on the soil microbes that can help you. You might want to smooth a row a few inches wide for planting tiny seeds and make sure there aren’t any canyons that will swallow the cucumbers.
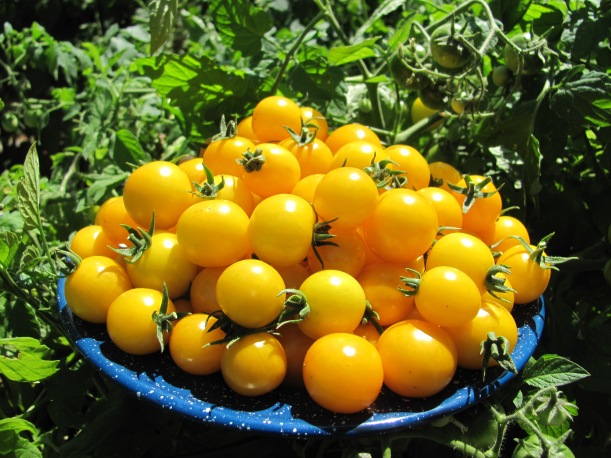
Gold Nugget cherry tomatoes are an early (55 days to maturity), determinate variety. These were grown with seed from Pinetree Garden Seeds, a mail order company in Maine.
Step 3 – Shop for seeds.
If you know any successful gardeners in our area, see if they will gift you some seeds.
Otherwise, you need to read the seed packets carefully. Keep in mind our average last day of frost is around May 25 and our average first day of frost is mid-September. It’s a short season. You need to look for short season vegetables.
Each packet will tell you how many days from seed germination until maturity (harvest). Remember, some seeds take a week or more to germinate. Look for vegetable varieties that are in the range of 45 to 70 days. Next year you can try starting tomatoes indoors or growing them with some kind of season extender like a hoop house or row cover.
Meanwhile, look for tomatoes, eggplants, cucumbers and peppers ready to transplant.
Easy to grow from seed are the squashes, beans, kale, chard and leaf lettuces (not head lettuce).
Step 4 – Plant seeds and transplant plants.
Follow the seed packet directions on when and how to plant. Make sure your soil is moist already.
For transplanting, normally you plant the plant so it sits at the same height as it did in the pot. However, if it’s a tomato that looks a little leggy, you can bury a few inches of its stem.
Step 5 – Mulch.
We use old tree leaves and pesticide-free grass clippings at our house. Straw is good, but not hay or anything with seeds. An inch or two of mulch will keep down the weeds and keep the soil from drying out too fast.
Step 6 – Water.
Catherine said consistency is most important. Once the plants are established, you can let the top inch of soil dry out (test it with your finger) in between thorough waterings, but if you are not consistent with providing enough water, you will not get good yields.
If you seem to have impenetrable clay soils, try watering for a couple minutes, then water elsewhere and then come back 15 minutes later and see if the soil will absorb the rest of the water it needs.
Step 7 – Fertilize.
Seedlings don’t need fertilizer for a few weeks, but vegetables are soon hungry. Organic gardeners use compost—like your mulch as it decays, or “teas” made from soaking compost—read up first. Avoid all manure, Catherine recommended. It tends to be salty (bad for our soils), full of weed seeds and may harbor pathogens. Avoid chemical fertilizers with too much nitrogen too—nitrogen grows great leaves but little if any fruit. Do not use weed and feed products—they will kill your veggies.
Step 8 – Weed.
If you mulch and don’t overwater, you shouldn’t have much of a weed problem. Visit your veggies every day and pull them or use a dandelion digger (don’t hoe) on any little green interlopers. It’s much easier than waiting until the weeds grow roots to Earth’s core and shed seeds across the continent.
Step 8 – Protect.
Everything is out to get your veggies before you can harvest them: frost, wind, hail, antelope, rabbits, insects, diseases. There are preventative and non-chemical actions you can take. Check my archives.
Step 9 – Harvest.
I remember the first summer after I became a Master Gardener. I told my husband, our family’s vegetable grower, that I wanted to try to grow vegetables myself from start to finish. I did, and they had the most incredible flavor.
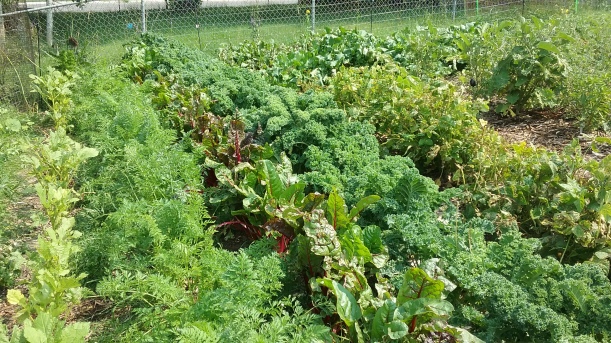
Cheyenne gardener Sandra Cox used large amounts of compost when starting a garden at her new house and had fantastic results.

